4×5 Membrane Matrix Keypad (20 Keys) User’s Guide
User’s Guide: PHI1003459 – 4×5 Membrane Matrix Keypad (20 Keys)
1. Overview
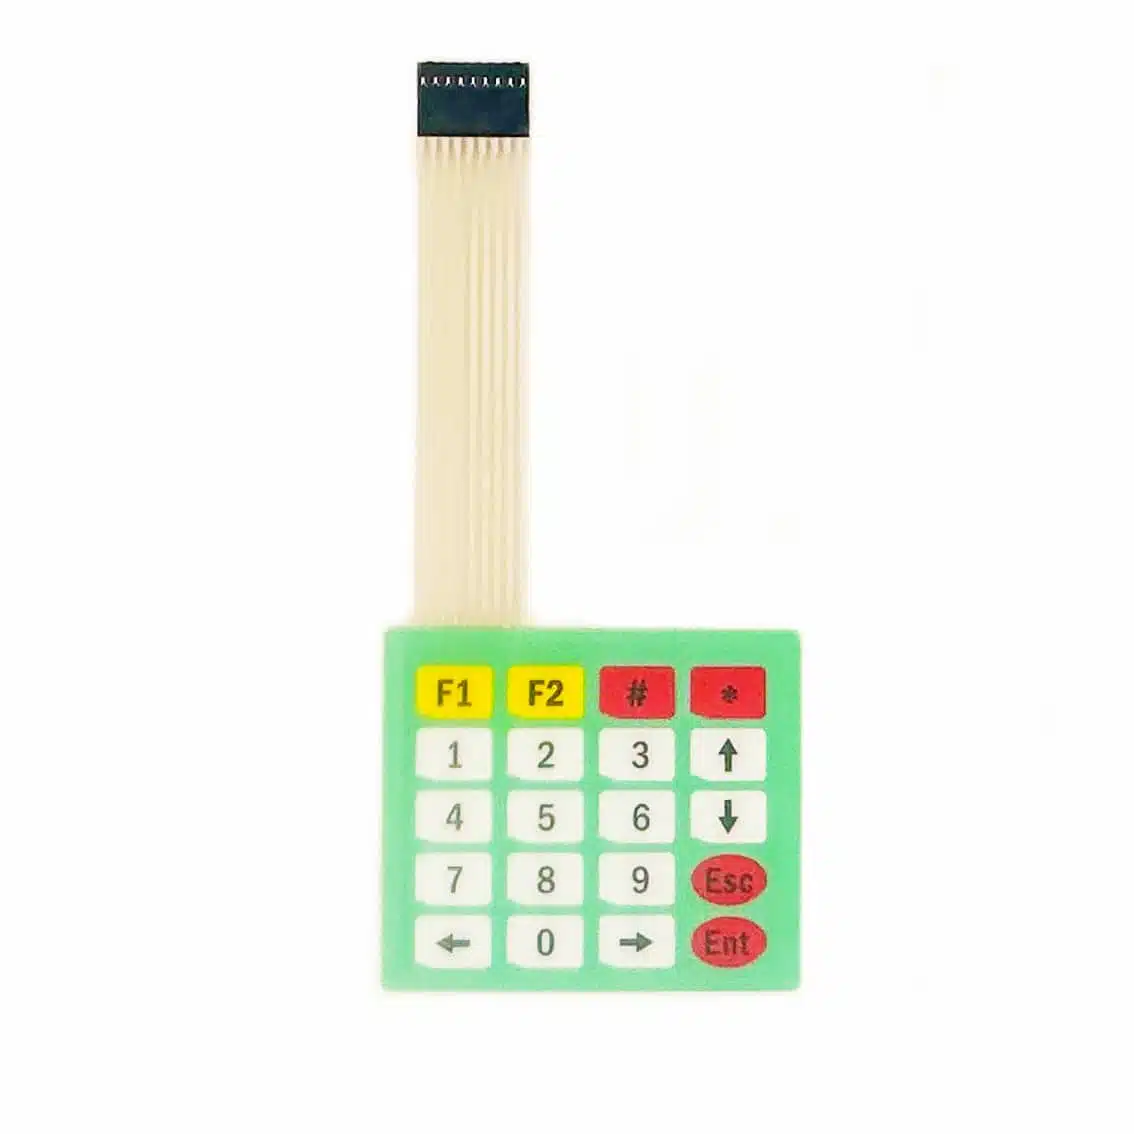
The PHI1003459 is a 20‑key membrane matrix keypad arranged in 4 rows × 5 columns.
- Keys: 0–9 plus function keys (F1, F2, arrow, #, *, esc, enter, etc., depending on printed legend).
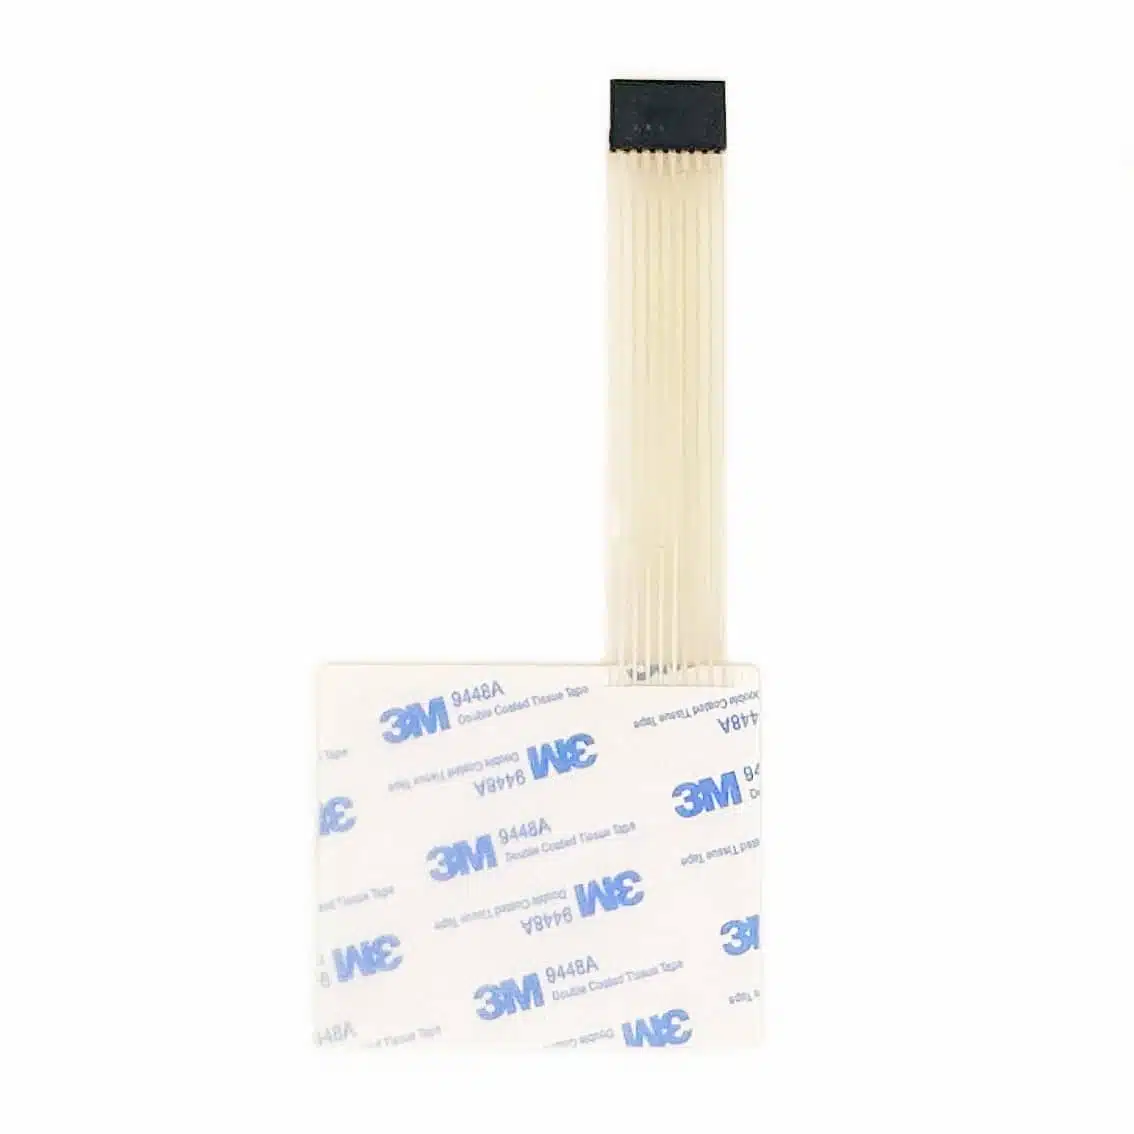
- Connector: 9‑pin ribbon cable (4 row lines + 5 column lines).
- Applications: PIN entry, calculators, menu navigation, robotics control panels, and DIY electronics kits.
The back side has a pressure‑sensitive adhesive transfer tape. These are widely used in membrane keypads and overlays because they provide strong bonding to plastics and metals while keeping the profile thin.
2. Pinout (Based on 9‑pin Ribbon Connector)
From the images, the keypad uses a single 9‑pin flat cable. The mapping is:
| Pin | Function | Description |
|---|---|---|
| 1 | R1 | Row 1 |
| 2 | R2 | Row 2 |
| 3 | R3 | Row 3 |
| 4 | R4 | Row 4 |
| 5 | C1 | Column 1 |
| 6 | C2 | Column 2 |
| 7 | C3 | Column 3 |
| 8 | C4 | Column 4 |
| 9 | C5 | Column 5 |
Always confirm with a continuity test if unsure, as pin order can vary slightly between batches.
3. Working Principle
- Each key press connects one row line to one column line.
- The microcontroller scans rows and columns to detect which key is pressed.
- Example: Pressing
5connects Row 2 with Column 2.
4. Wiring Example (Arduino UNO)
Keypad Pin → Arduino Pin
R1 → D2
R2 → D3
R3 → D4
R4 → D5
C1 → D6
C2 → D7
C3 → D8
C4 → D9
C5 → D10
5. Arduino Code Example
#include <Keypad.h>

const byte ROWS = 4; // four rows
const byte COLS = 5; // five columns

char keys[ROWS][COLS] = {
  {'1','2','3','A','B'},
  {'4','5','6','C','D'},
  {'7','8','9','E','F'},
  {'*','0','#','G','H'}
};

byte rowPins[ROWS] = {2, 3, 4, 5};       // R1–R4
byte colPins[COLS] = {6, 7, 8, 9, 10};   // C1–C5

Keypad keypad = Keypad(makeKeymap(keys), rowPins, colPins, ROWS, COLS);

void setup() {
  Serial.begin(9600);
}

void loop() {
  char key = keypad.getKey();
  if (key) {
    Serial.println(key);
  }
}
6. Applications
- Numeric entry for calculators or PIN systems
- Menu navigation in embedded projects
- Security systems (password input)
- Educational kits (matrix scanning demonstration)
- DIY controllers for robotics or games
7. Best Practices
- Use the Keypad library for reliable scanning and debouncing.
- Secure the ribbon connector to avoid false inputs.
- Mount the keypad on a flat surface for durability.
- For ESP32/ESP8266, check pin availability before wiring.
- Combine with an LCD/OLED for user feedback in larger projects.