Matrix Keyboard Library – Arduino
This article was created for historical purposes to provide our customers with an old post on the Arduino website, which has become challenging to locate.
Description
Keypad is a library for using matrix-style keypads with Arduino. As of version 3.0 it now supports multiple keypresses.
This library is based on the Keypad Tutorial.
It was created to promote Hardware Abstraction. It improves the readability of the code by hiding the pinMode and digitalRead calls for the user.
Keypad library is part of the Hardware Abstraction libraries.
Version 3.0 was just posted (19 July 2012) and rewritten to support multi-keypresses by default. But for those who still need the original single-keypress functionality, the library is fully backwards compatible.
You won’t need external resistors or diodes because the library uses internal pullup resistors and ensures that all unused column pins are high-impedance.
Support was added to allow other hardware to be used along with a keypad. Joe Young’s keypad library added support for several I2C expander chips. You can find it here: https://github.com/joeyoung/arduino_keypads
Download, install and import
This library is now available via the Arduino IDE library manager. If you are using a modern IDE (1.6.2 or above), you can simply use the menu:
Sketch->Include Library->Manage Libraries… Then search for Keypad.
Once found, click on its entry, and the install button will appear. The zip file below is for the retro IDE’s (not recommended for use, upgrade!).
Put the Keypad folder in “arduino\libraries\”.
In the Arduino IDE, create a new sketch (or open one) and select from the menubar “Sketch -> Import Library -> Keypad”.
Once the library is imported, an “#include <Keypad.h>” line will appear at the top of your Sketch.
Creation
Constructors:
- Keypad(makeKeymap(userKeymap), row[], col[], rows, cols)
const byte rows = 4; //four rows
const byte cols = 3; //three columns
char keys[rows][cols] = {
  {'1','2','3'},
  {'4','5','6'},
  {'7','8','9'},
  {'#','0','*'}
};
byte rowPins[rows] = {5, 4, 3, 2}; //connect to the row pinouts of the keypad
byte colPins[cols] = {8, 7, 6}; //connect to the column pinouts of the keypad
Keypad keypad = Keypad( makeKeymap(keys), rowPins, colPins, rows, cols );
Instantiates a Keypad object that uses pins 5, 4, 3, 2 as row pins, and 8, 7, 6 as column pins.
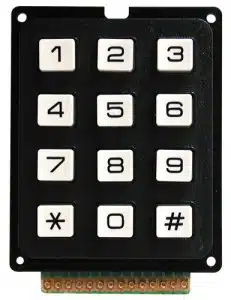
This keypad has 4 rows and 3 columns, resulting in 12 keys.
Functions
void begin(makeKeymap(userKeymap))
Initializes the internal keymap to be equal to userKeymap
[See File -> Examples -> Keypad -> Examples -> CustomKeypad]
char waitForKey()
This function will wait forever until someone presses a key. Warning: It blocks all other code until a key is pressed. That means no blinking LED’s, no LCD screen updates, no nothing with the exception of interrupt routines.
char getKey()
Returns the key that is pressed, if any. This function is non-blocking.
KeyState getState()
Returns the current state of any of the keys.
The four states are IDLE, PRESSED, RELEASED and HOLD.
boolean keyStateChanged()
New in version 2.0: Let you know when the key has changed from one state to another. For example, instead of just testing for a valid key, you can test for when a key was pressed.
setHoldTime(unsigned int time)
Set the number of milliseconds the user will have to hold a button until the HOLD state is triggered.
setDebounceTime(unsigned int time)
Set the number of milliseconds. The keypad will wait until it accepts a new keypress/key event. This is the “time delay” debounce method.
addEventListener(keypadEvent)
Trigger an event if the keypad is used. You can load an example in the Arduino IDE.
[See File -> Examples -> Keypad -> Examples -> EventSerialKeypad] or see the KeypadEvent Example code.
For Now
Here’s the list of multi-keypress functions and the keylist definition. I will complete their descriptions this weekend.
- Key key[LIST_MAX]
- bool getKeys()
- bool isPressed(char keyChar)
- int findInList(char keyChar)
Example
#include <Keypad.h>

const byte ROWS = 4; //four rows
const byte COLS = 3; //three columns
char keys[ROWS][COLS] = {
  {'1','2','3'},
  {'4','5','6'},
  {'7','8','9'},
  {'#','0','*'}
};
byte rowPins[ROWS] = {5, 4, 3, 2}; //connect to the row pinouts of the keypad
byte colPins[COLS] = {8, 7, 6}; //connect to the column pinouts of the keypad

Keypad keypad = Keypad( makeKeymap(keys), rowPins, colPins, ROWS, COLS );

void setup(){
  Serial.begin(9600);
}

void loop(){
  char key = keypad.getKey();

  if (key != NO_KEY){
    Serial.println(key);
  }
}
FAQ
How do I use multiple Keypads?
Keypad is a class. Therefore to use multiple Keypad, you must create an instance for each of them. In the example above, the Keypad instance keypad) was bound to the digital pins 2, 3, 4, 5, 6, 7 and 8.
To add a Keypad bound to digital pins 9, 10, 11, 12, 13, 14, 15 and 16, you could create the following instance keypad2:
const byte ROWS2 = 4; //four rows
const byte COLS2 = 4; //four columns
char keys2[ROWS2][COLS2] = {
  {'.','a','d','1'},
  {'g','j','m','2'},
  {'p','t','w','3'},
  {'*',' ','#','4'}
};
byte rowPins2[ROWS2] = {12, 11, 10, 9}; //connect to the row pinouts of the keypad
byte colPins2[COLS2] = {16, 15, 14, 13}; //connect to the column pinouts of the keypad

Keypad keypad2 = Keypad( makeKeymap(keys2), rowPins2, colPins2, ROWS2, COLS2 );
And now it’s just a matter of using whatever function is wanted on each keypad:
//update instances and possibly fire funcitons
void loop(){
  char key1 = keypad.getKey();
  char key2 = keypad2.getKey();

  if (key1 != NO_KEY || key2 != NO_KEY){
    Serial.print("You pressed: ");
    Serial.print(key1 != NO_KEY ? key1 : "nothing on keypad");
	Serial.print(" and ");
    Serial.print(key2 != NO_KEY ? key2 : "nothing on keypad2");
    Serial.println(".");
  }
}
How do I use setDebounceTime(unsigned int time)?
In Arduino follow the main menu from File-> Examples-> Keypad-> Examples-> DynamicKeypad. Once the sketch is open find setup() and there you will see:
void setup()  {
  Serial.begin(9600);
  digitalWrite(ledPin, HIGH);            // Turns the LED on.
  keypad.addEventListener(keypadEvent);  // Add an event listener.
  keypad.setHoldTime(500);               // Default is 1000mS
  keypad.setDebounceTime(250);           // Default is 50mS
}
This shows that the debounce time will allow one key press every 250 milliseconds. If multiple key presses occur within that time frame (as would happen when a key is bouncing) then those extra presses are simply ignored.