Read this article if you want to add an OLED display to your ATtiny85 and simulate them in WOKWI.
Introduction
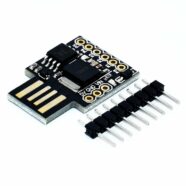
The ATtiny85 looks like a tiny MCU, but don’t get fooled of what it can do. It can drive a small digital display enough to be used for simple games, clocks, or interactive menus. Here, you’ll learn how to incorporate an OLED display into your ATtiny85 designs along with a WOKWI simulation walkthrough.
About the ATtiny85 Driving an OLED Display
Below are the specifications of an ATtiny85:
Architecture: 8-bit AVR RISC
Program Memory: 8 KB ISP Flash
RAM: 512 bytes
EEPROM: 512 bytes
I/O Pins: 6 general purpose I/O pins
Timers: One 8-bit timer/counter with PWM output, one 8-bit high-speed timer/counter with PWM output
ADC: 4-channel 10-bit Analog-to-Digital Converter (ADC)
Oscillator: Internal calibrated RC oscillator running at 8 MHz, with an external 32.768 kHz oscillator option
Operating Voltage: 1.8V to 5.5V
Current Consumption: Low-power consumption (300 µA active, 0.1 µA in power-down mode)
Package: 8-pin PDIP, 8-pin SOIC, 8-pin DIP
One of the unique aspects of this tiny MCU is it’s decent RAM size of 512 bytes (half a kilobyte). This size is quite generous compared to what most 8 bit 8-pin/14/16 pin MCU’s have. RAM size is important for data processing, especially for graphics which may require a framebuffer in RAM that can be refreshed in your code quickly.
A framebuffer is a temporary location in RAM that contains a bitmap image that is then transferred to a digital display, such as an OLED, in order to display graphics.
However, things may not fit exactly, and some compensation is required due to the limited RAM of the ATtiny85 (compared to what bigger MCU’s have, e.g. 2048 bytes for the ATMEGA128P). If you look at a 128×64 OLED, it has exactly 8192 pixel data.
128 x 64 = 8192
A data transfer is usually done in chunks of 8 bits and we have an 8-bit microcontroller. This means you’ll need about 1k bytes of framebuffer in RAM to fill the whole picture.
8192 / 8 = 1024
However, as the ATtiny85 has only 512 bytes of RAM, this amount of data should be transferred many times in order to display full pixel graphics on the 128×64 OLED screen.
Fortunately, the SSD1306 has an internal framebuffer, so you don’t have to worry of needing a large buffer in RAM on your MCU to store graphics or bitmaps. However, graphics animation would be faster if you had the 1K buffer in RAM.
Below, you’ll discover some Arduino libraries for the SSD1306 that will take care of the graphics display.
Simulation in WOKWI
Start WOKWI and Add Components
To save debug time in hardware, WOKWI simulation is done first. Go ahead and open and clean an ATtiny85 Blinky Project, add an OLED component, then and save it.
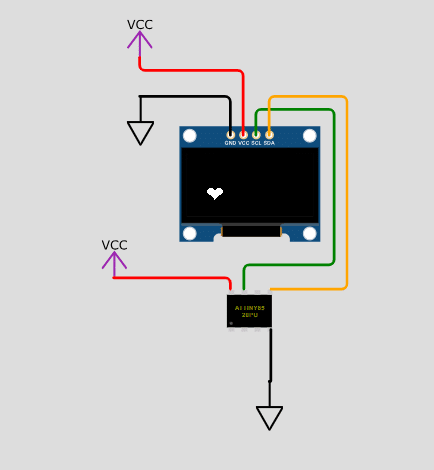
Create your Connections
Next, create the necessary connections for the ATtiny85 and OLED. PB2 is connected to SCL, while PB0 is connected to SDA. These connections will be compatible with the OLED library we’ll use later.
Add the Necessary Libraries
After this, you can start creating code. An OLED and I2C library will be used. However, the common Adafruit SSD1306 and Wire libraries cannot be used since these libraries are meant for larger microcontrollers (like the ATMEGA128P) as discussed before. With this, use the Tiny libraries TinyWireM and Tiny4kOLED as I2C and OLED libraries that are meant for the ATtiny microcontrollers instead.
Display Hello World on the OLED
Here is code to initialize the OLED and print Hello World! Notice that oled.begin() initializes the 128×64 OLED module accordingly with the necessary parameters. You can choose parameters based on your OLED resolution. a b signifies “right”, while an r signifies “rotate”.
					// ATtiny85 OLED

#include <TinyWireM.h>
#include <Tiny4kOLED.h>

void setup() {

  // Initialize OLED screen
  oled.begin(128, 64, sizeof(tiny4koled_init_128x64br), tiny4koled_init_128x64br);

  // Two fonts are supplied with this library, FONT8X16 and FONT6X8
  oled.setFont(FONT6X8);

  // To clear all the memory
  oled.clear();
  oled.on();

  // Print something
  oled.clear();
  oled.setCursor(20, 1);
  oled.print(F("Hello World!"));
}

void loop() {

}
Here is the actual simulation.
Additionally, you can add your own bitmap image. Some examples are given on Wokwi. See the code below that displays a heart-shaped bitmap. Graphics data is placed on a variable array (img_heart_big) in program memory. This data can be shown through the oled.bitmap( ) function. The parameters of the oled.bitmap( ) function are the x and y coordinates, and the width and the height of the pixel data.
					// ATtiny85 OLED

#include <TinyWireM.h>
#include <Tiny4kOLED.h>

const unsigned char  img_heart_big[] PROGMEM = {
  0xe0, 0xf0, 0xf8, 0xf8, 0xf8, 0xf8, 0xf0, 0xe0, 0xe0, 0xe0, 0xf0, 0xf8, 0xf8, 0xf8, 0xf8, 0xf0, 0xe0, 0x00, 0x01, 0x03, 0x07, 0x0f, 0x1f, 0x3f, 0x7f, 0xff, 0x7f, 0x3f, 0x1f, 0x0f, 0x07, 0x03, 0x01, 0x00
};

void setup() {

  // Initialize OLED screen
  oled.begin(128, 64, sizeof(tiny4koled_init_128x64br), tiny4koled_init_128x64br);

  // Two fonts are supplied with this library, FONT8X16 and FONT6X8
  oled.setFont(FONT6X8);

  // To clear all the memory
  oled.clear();
  oled.on();

  // Print something
  oled.bitmap(20, 4, 37, 6, img_heart_big);
}

void loop() {


}
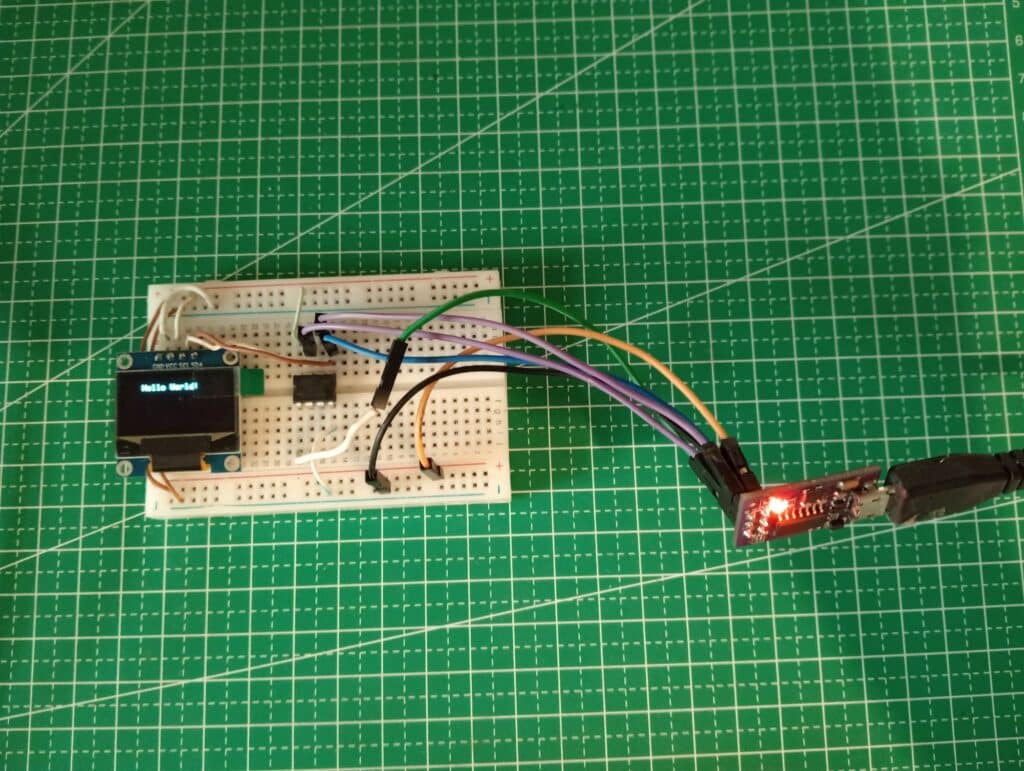
Actual Hardware
You can now begin to construct your hardware. A word of note, though, is that previous SSD1306 settings can be retained in your device’s memory. With this, you may want to refresh the settings and enable the charge pump power supply of the SSD1306.Try them out, especially if you are having trouble with your display. Do it through these statements:
					    oled.begin(128, 64, sizeof(tiny4koled_init_defaults), tiny4koled_init_defaults);
    oled.enableChargePump(); // The default is off, but most boards need this.
    oled.setRotation(1);     // The default orientation is not the most commonly used.
Arduino Programming and Output
Choose the correct device, programmer and settings. If you haven’t, Burn the Bootloader with the same settings for your code. After finishing your code, choose Upload using Programmer to burn the firmware to your device.
You may want to check How to Program an ATtiny85 if you want in-depth info on the programming process.
Here is code with an additional heartbeat animation (taken from Wokwi sample codes) using the oled.bitmap() function.
					// ATtiny85 OLED

#include <TinyWireM.h>
#include <Tiny4kOLED.h>

const unsigned char  img_heart_small[] PROGMEM = {
  0x00, 0x00, 0xc0, 0xe0, 0xe0, 0xe0, 0xc0, 0x80, 0x80, 0x80, 0xc0, 0xe0, 0xe0, 0xe0, 0xc0, 0x00, 0x00, 0x00, 0x00, 0x00, 0x01, 0x03, 0x07, 0x0f, 0x1f, 0x3f, 0x1f, 0x0f, 0x07, 0x03, 0x01, 0x00, 0x00, 0x00
};

const unsigned char  img_heart_big[] PROGMEM = {
  0xe0, 0xf0, 0xf8, 0xf8, 0xf8, 0xf8, 0xf0, 0xe0, 0xe0, 0xe0, 0xf0, 0xf8, 0xf8, 0xf8, 0xf8, 0xf0, 0xe0, 0x00, 0x01, 0x03, 0x07, 0x0f, 0x1f, 0x3f, 0x7f, 0xff, 0x7f, 0x3f, 0x1f, 0x0f, 0x07, 0x03, 0x01, 0x00
};

void heartBeat() {
  static char big = 1;
  static long startTime = 0;
  long currentTime;

  // Get current time
  currentTime = millis();

  // Update if 200ms passed
  if ((currentTime - startTime) > 200) {
    startTime = currentTime;
    big = 1 - big;

    if (big) {
      oled.bitmap(20, 4, 37, 6, img_heart_big);
    } else {
      oled.bitmap(20, 4, 37, 6, img_heart_small);
    }
  }
}

void setup() {

  // Initialize OLED screen
  oled.begin(128, 64, sizeof(tiny4koled_init_128x64br), tiny4koled_init_128x64br);

  // Two fonts are supplied with this library, FONT8X16 and FONT6X8
  oled.setFont(FONT6X8);

  // To clear all the memory
  oled.clear();
  oled.on();

  // Print something
  oled.clear();
  oled.setCursor(20, 1);
  oled.print(F("Hello World!"));
}

void loop() {

  heartBeat();
}