- Navigate to: https://www.arduino.cc/en/Main/Software
- Download and install the Arduino IDE
- Open the Arduino IDE on your computer
- Connect the Arduino board to your computer via USB cable
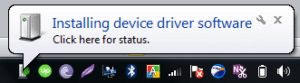
- If you’re using a Windows machine, you will see a popup indicating that the device driver is being installed

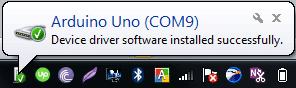
- Once the driver is successfully installed, it will show you the port it is connected to. For example, it might be “COM9”, but it could be different for you. Note this port number, as you will need it later.

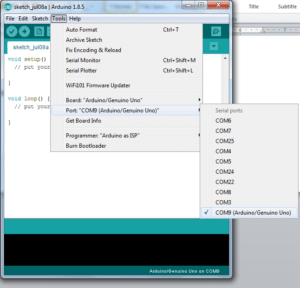
- In the Arduino IDE, navigate to Tools > Port: “COM9 (Arduino/Genuino Uno)” > “COM9”. This may be different for you, depending on which COM port was assigned to your board in the previous steps.

- Congratulations! You have successfully installed the Arduino IDE software and connected to your Arduino board.