Are you curious about how the Raspberry Pi Camera works? Want to learn how to program with it using a Raspberry Pi? Read the rest of the article to find out.
Introduction
A Raspberry Pi Camera is a very handy tool, primarily if you’re involved in trying to automate still shot captures or video recordings. It has exceptionally high specifications for a hobbyist’s CMOS-based camera. There are currently two kinds of RPI cameras available today for the RPI.
Different Kinds of RPI Cameras
Camera Module V2
This camera has a total of 8 Megapixels. It can capture video modes at 1080p / 30 fps. It can also do captures at 720p / 60 fps. At 640x480p, it can reach frame rates up to 90 fps. It uses the Sony IMX219 camera sensor capped at 3280 × 2464 pixels.
HQ Camera
This camera has a total of 12.3 Megapixels. It can capture video modes the same as the Camera Module V2. It uses the Sony IMX477 camera sensor capped at 4056 x 3040 pixels. What’s good about this camera is that it can be equipped with powerful lenses.
Camera Module V1
This camera has been officially discontinued by the Raspberry Pi foundation, although it can still be bought through third-party sources. It has a total resolution of 5 Megapixels and has video capture modes the same as Camera Module V1. It has an OmniVision OV5647 camera sensor capped at 2592 × 1944 pixels.
The Camera Interface
A Raspberry Pi camera interfaces via MIPI CSI-2 (Mobile Industry Processor Interface Camera Serial Interface Type 2). As the name implies, it’s become a mobile industry standard. It’s the same interface utilized on most modern cellphone cameras.
MIPI CSI-2 runs at speeds in Gigabits per second. This is the reason why your RPI cameras can run at high resolutions at high frame rates.
Camera Module - First Time Use
Connecting The Camera
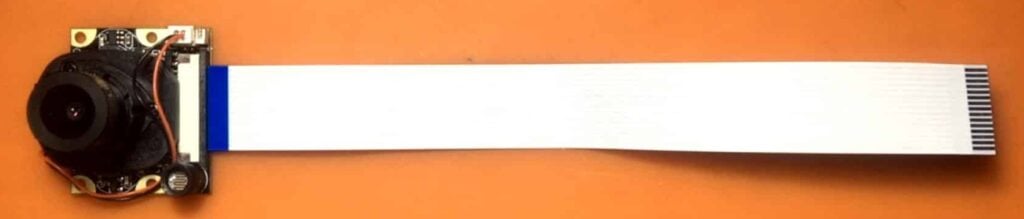
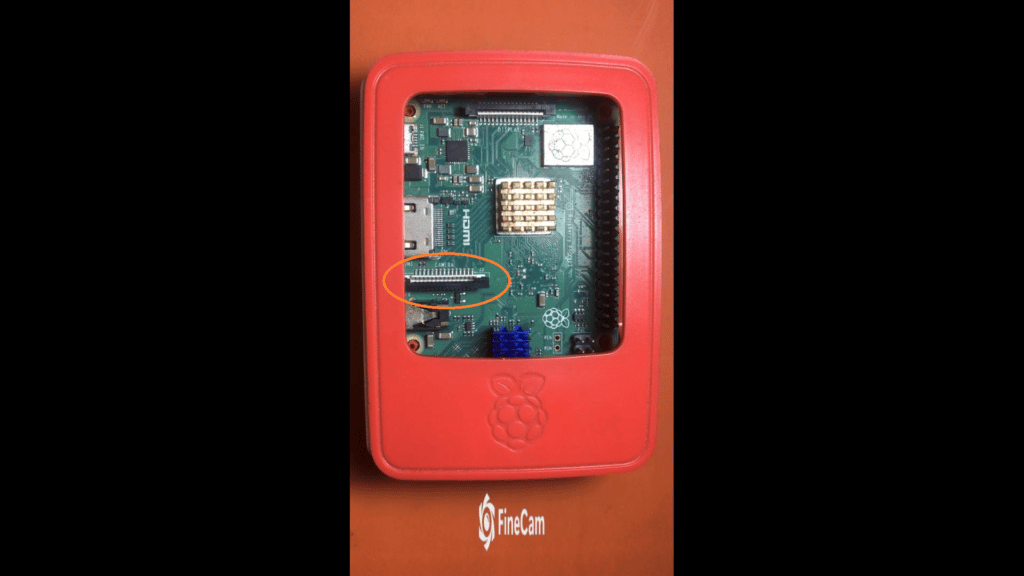
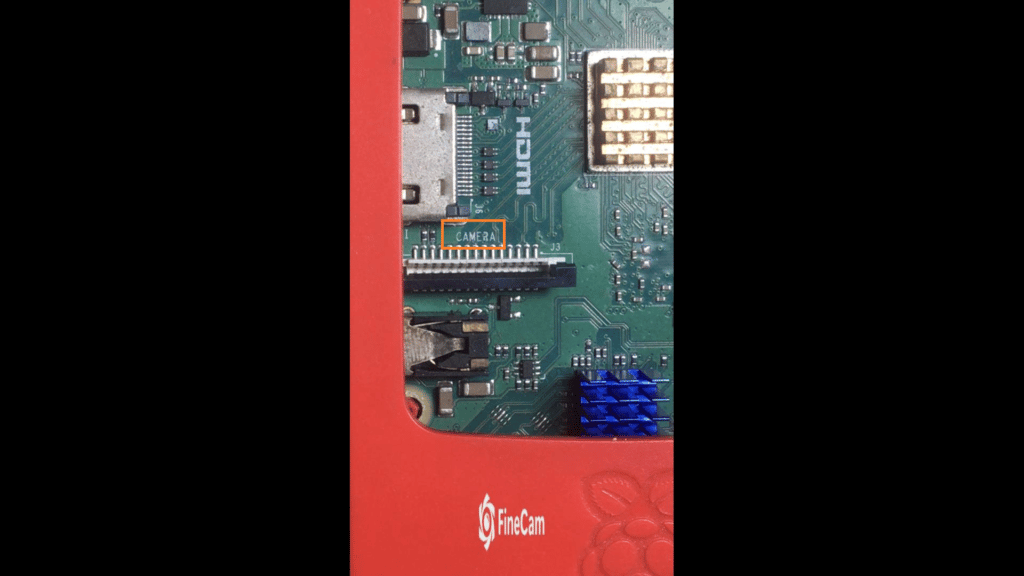
The RPI camera comes with a ribbon cable attachment. This ribbon connects the camera to the 15-pin FPC/FFC connector of the Raspberry Pi. This FPC connector is usually located between the Ethernet and the HDMI connectors and is labelled CAMERA. If you’re going to attach this ribbon cable, make sure the exposed metal conductors of the cable come in contact with those of the FPC connectors. To correctly set this up, you’ll usually have to face the blue plastic strip of the cable facing the Ethernet port side.
Enabling The Camera Module
First, make sure that your Raspberry Pi software components are up-to-date. To do that, on a terminal window, type:
sudo apt-get update
sudo apt-get upgrade
Next, configure your Raspberry Pi to be able to use the camera. Type:
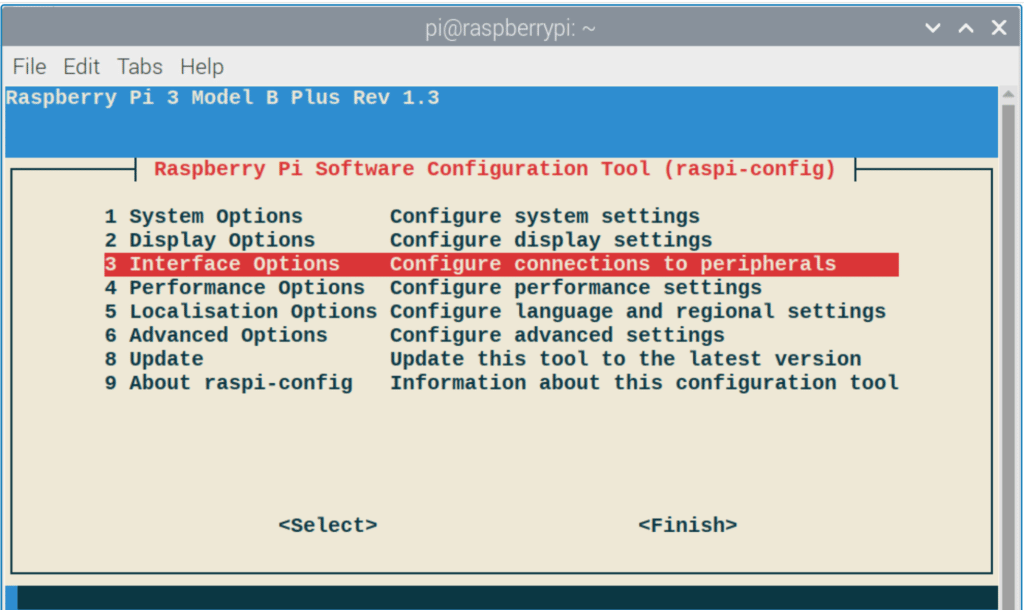
sudo raspi-config
Choose Interface Options
Then enable the Raspberry Pi camera
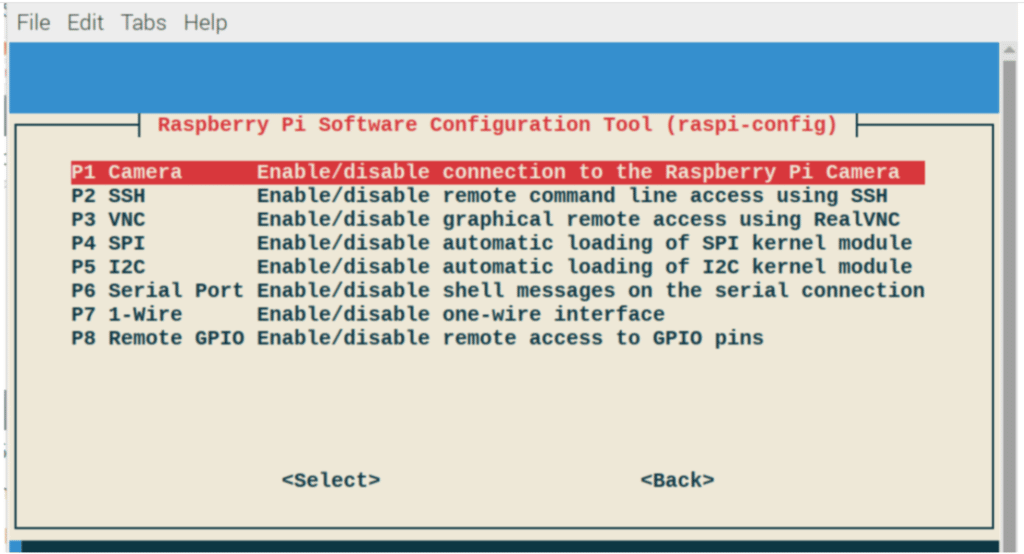
Reboot your RPI, then continue.
Note that the RPI camera libraries are transitioning to a newer form of the library as of writing this article. There are currently two libraries available for the RPI camera, namely, the newer libcamera and the legacy raspicam stack.
Libcamera is still in the works and hasn’t gotten the Python bindings yet. For this reason, many people still use the raspicam stack. In the future, we may see libcamera adapt to the Python libraries.
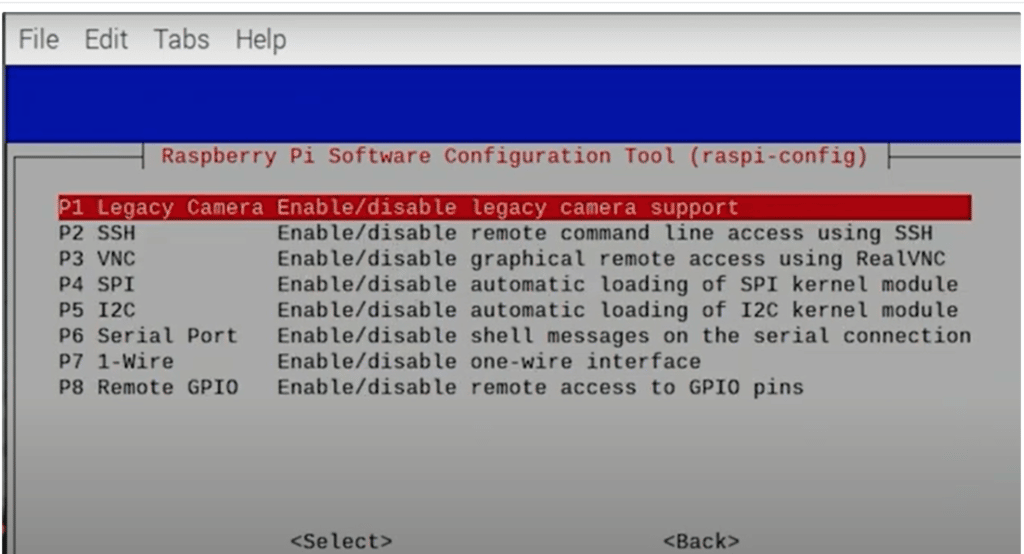
Note that RPI 4 users who have Bullseye OS or beyond will have the raspicam library removed. To re-enable the library, you’ll have to re-configure your Raspberry Pi. To do this, type:
sudo raspi-config
Select Interface Options and then enable Legacy Camera support.
RPI users who currently have Buster OS or below will only have the raspicam library installed. Coincidentally, they can still install libcamera if they want to.
Testing The Camera
You’ll be able to test your RPI cameras immediately out of the box using a Shell window.
Use the below code to test taking a picture.
raspistill -v - o cameratest.jpg
You’ll get a 5-second preview of your camera, including a snapshot saved in your home directory.
You can create a directory for testing other camera functions like:
mkdir camera_test
The basic commands for capturing still images use the raspistill command.
Here are some other usage examples of the raspistill command
raspistill -vf -o /home/pi/camera_test/test.jpg
Vertically flips the captured image.
raspistill -hf -o /home/pi/camera_test/test.jpg
Horizontally flips the captured image.
raspistill -w 640 -h 480 -o /home/pi/camera_test/test.jpg
Captures a still image in 640 x 480 pixels.
The basic commands for capturing videos on your camera make use of the raspivid command.
raspivid -o /home/pi/test_vid.h264
In this command, you’ll have approximately 5 seconds of captured video data saved in test_vid.h264.
Here are some other usage examples of the raspivid command:
raspivid -w 640 -h 480 -o /home/pi/camera_test/ test_640_480.h264
Captures a video in 640×480 resolution.
raspivid -o -vf -hf /home/pi/camera_test/test_vid_flipped.h264
Captures a vertically and horizontally flipped video at the same time.
Developing Code for your Camera
We can make Python code using the raspicam library stack as raspicam already has Python bindings.
Open Thonny Python IDE on your RPI, then start typing the Python script below:
					import picamera
from time import sleep

with picamera.PiCamera() as camera:
    camera.resolution = (1280, 720)
    camera.start_preview(alpha=200)
    print("Starting capture...")
    sleep(5)
    camera.capture('/home/pi/camera_test/test_capture4.jpg')
    print("Finished...")
This code is for capturing a still image on your RPI camera with a timed preview.
We see here that we’ve imported both the picamera and sleep function from the time module.
Next, we created a camera object from the picamera.PiCamera() function.
We’ve set the camera resolution to be in HD as can be seen on the camera.resolution() statement.
Next, we started the preview but also included an alpha blend of 200. This will give a semi-transparent preview of our capture so that we know what is going on in our Python status window.
We sleep for 5 seconds to get ourselves ready and then continue with the capture using camera.capture ( ).The complete filename and path of our jpg file must be stated in the capture( ) function.
					import picamera
from time import sleep
with picamera.PiCamera() as camera:
    camera.resolution = (1280, 720)
    camera.start_preview(alpha=200)
    print("Start recording video")
    camera.start_recording('/home/pi/Desktop/sample6_video.h264')
    sleep(10)
    camera.stop_recording()
    print("Stop recording video")
    camera.stop_preview()
In this next code, we are recording a video with a pre-determined length.
As with our previous code, we import the necessary libraries.
We start the video recording with a camera.start_recording( ) and input the video file’s complete destination path and directory. Note that we are saving it in the .h264 format, an advanced video codec. This is the default setting of the camera.start_recording( ) command.
Unfortunately, the raspicam stack cannot save your captured video in the universal .mp4 format. You’ll need a separate package to do that conversion.
Lastly, we end the capture with the camera.stop_preview() statement.
The completed codes can be downloaded here.
Extra Tips
To be able to play your .h264 file into almost any kind of media player, you’ll need to convert it to an MP4 file. To do this, download the gpac library by typing:
sudo apt-get install gpac
Next, run MP4Box with this command:
Next, run MP4Box with this command:
After that, you can play your video with your favourite media player, Windows Media Player.
In case you want to automatically convert your captured .h264 file in your Python code, you’ll have to import another module.
from subprocess import call
The call function will be able to execute Linux commands just like you do in your terminal shell window.
To execute this, write your command in a string object:
convert_command = "MP4Box -add your_sample_video.h264 your_sample_video.mp4"
Then execute it using the call function
call = ([convert_command], shell=True)
Conclusion
The Raspberry Pi Camera is a very useful tool for doing still captures and video recordings. You just need to set it up correctly with the supplied ribbon cable. Next, configure and set up your RPI to enable access to this camera and use the libraries. Lastly, using Python as an interpreter, write code for it so that it can automate still captures and video recordings according to your specification.