Would you like to know how to use the Adafruit 32u4 Bluefruit LE as a MIDI Controller? Read this article to find out.
Introduction
MIDI stands for Musical Instrument Digital Interface. It’s a protocol designed to help different devices that produce or accept musical tones in electrical form communicate with each other. It was established in the 1980s. The two persons behind it pushing for standardization were Ikutaro Kakehashi (Roland) and Dave Smith (Sequential Circuits).
MIDI made it possible for musicians to interface with electronic instruments such as controllers, synthesizers, and computers (as digital audio workstations) more easily.
MIDI Controllers – MIDI devices that can generate MIDI notes or messages.
MIDI Synthesizers – MIDI devices that can generate actual sounds.
Through these devices, varied connections can be made, even daisy-chaining them from one another. MIDI generates notes and can also be programmed to output their specific timings and tones. Through this method, MIDI file sizes can actually be smaller compared to actual audio file sizes.
MIDI in microcontrollers
MIDI is perfect for microcontrollers because its tones and timings can be programmed. With this, you can program them as MIDI controllers. After that, you’ll need a way to send or receive MIDI messages to and from your MIDI-capable devices. A common setup is to make a MIDI controller out of your microcontroller and then transfer MIDI messages to a synthesizer or a digital audio workstation (such as a PC). With this, here are the different ways that you can connect MIDI-capable devices to one another.
THROUGH A MIDI CABLE
This is the classical way of communication through MIDI. This is composed of a DIN-5 connector and cable. MIDI messages are transferred through this cable without using any audio signal. Through this, concise communication can be made, eliminating the nature of analog noise.
THROUGH MIDI OVER UART
MIDI messages can travel over UART lines. This was the easier route for microcontrollers before as many did not have USB controllers back then. The UART protocol has been here for a long time now and is widely accepted.
THROUGH USB MIDI
With the advent of putting USB controllers on microcontrollers, USB MIDI devices are on the rise. It’s easy to set up USB MIDI as many of them are plug-and-play. Additionally, you can easily hook up USB MIDI devices to a PC and use different kinds of music software with them.
THROUGH BLE MIDI
BLE MIDI is a perfect setup for mobile gadgets that has MIDI features such as tablets or smartphones. With this, MIDI messages are transferred through a Bluetooth connection. This requires a Bluetooth peripheral installed on both the source and destination side. Fortunately, nowadays, it’s easy to set up and operate Bluetooth over MIDI thanks to its serial nature of communication using AT-style commands.
Making your First BLE MIDI Controller using a Feather Microcontroller
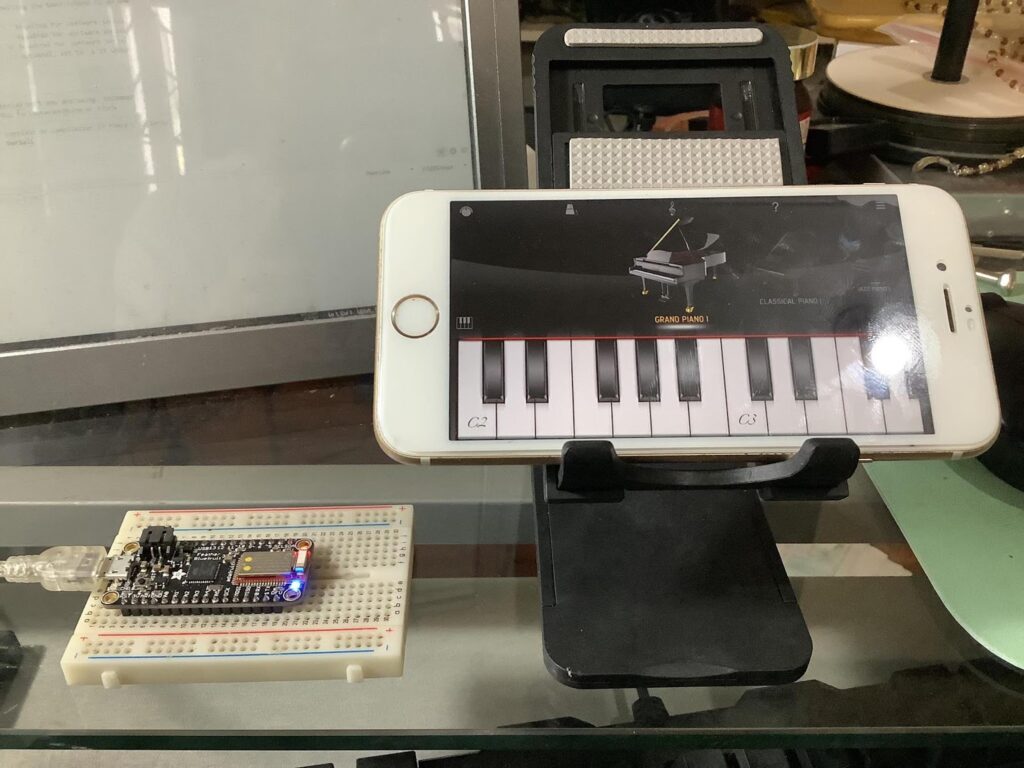
Probably one of the easiest ways to set up a MIDI controller is through Adafruiit Feather boards. There are several boards available for this, however, this article will focus on the 32u4 BlueFruit LE board. This Feather board has just the right specification to create simple BLE MIDI projects. Before you begin, you can browse through some introductory setup procedures for the 32u4 Bluefruit LE found in this article.
A SIMPLE BLE MIDI EXAMPLE
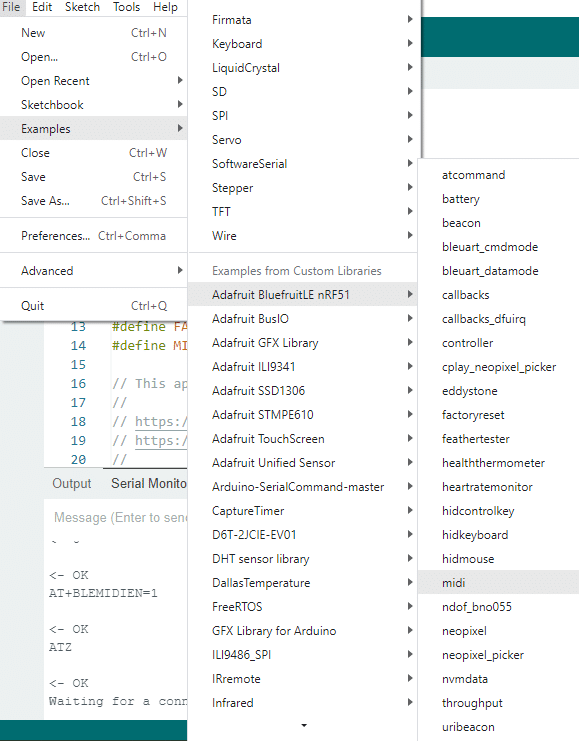
You can build a BLE MIDI keyboard easily by using the midi project as a reference from the Adafruit BluefruitLE nRF51 examples directory.
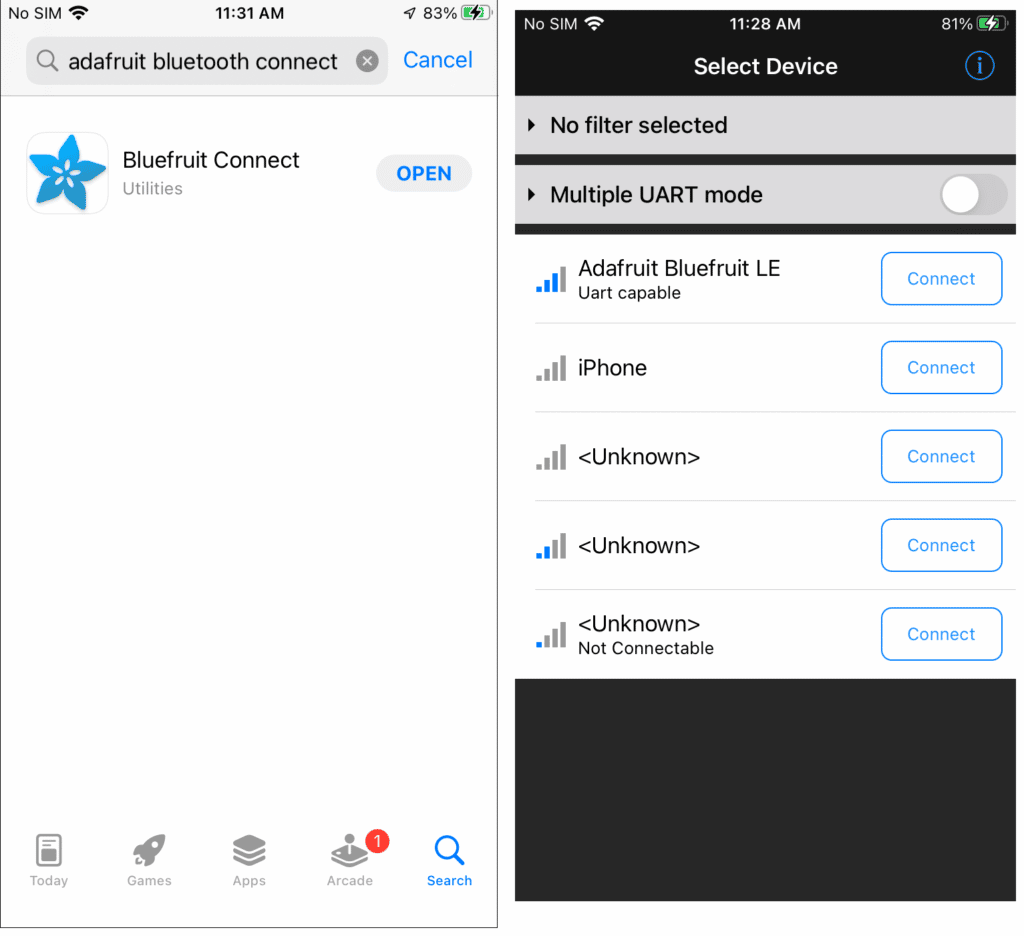
MAKE SURE TO UPDATE YOUR 32U4 BLUEFRUIT LE’S NRF51288 TO THE LATEST FIRMWARE VERSION
Download the latest Bluefruit Connect app from the Appstore. After turning on your Feather, run the app. Connect to your Feather that’s usually named Adafruit Bluefruit LE. If your Feather does not have the latest Bluetooth nRF51288 firmware, now is the time to update it. This will ensure that the example projects will run smoothly on your board.
Some Code Explanation
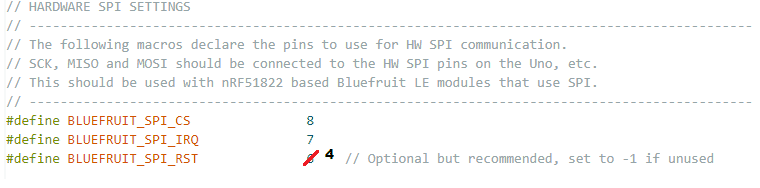
CHANGE THE SPI HARDWARE SETTINGS OF THE BLUEFRUITCONFIG.H CONFIG FILE
Change the hardware SPI settings to be compatible with your 32u4 BluiFruit LE as seen below. The BLUEFRUIT_SPI_RST pin should be changed accordingly.
BLE AND MIDI SETUP
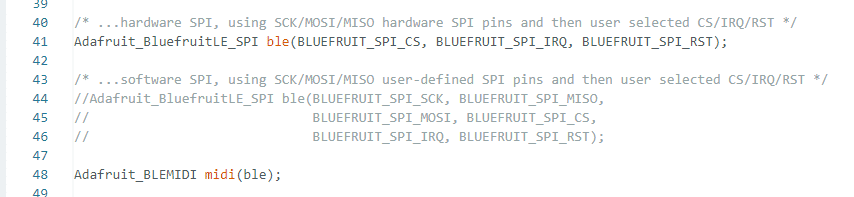
Here the ble object is instantiated as an Adafruit_BluefruitLE_SPI type while the midi object an Adafruit_BLEMIDI type.
BLE MIDI RECEIVE FUNCTION
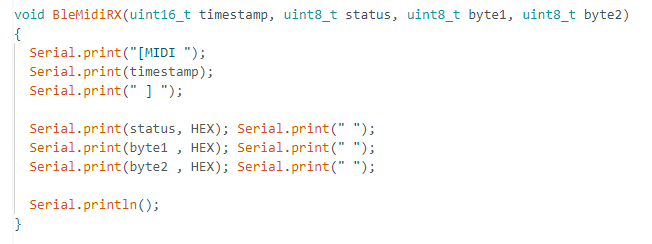
A BleMidiRx() function is declared to be used as callback when MIDI IN Messages arrive. It simply displays the notes it received via Bluetooth.
BLE AND MIDI INITIALIZATION
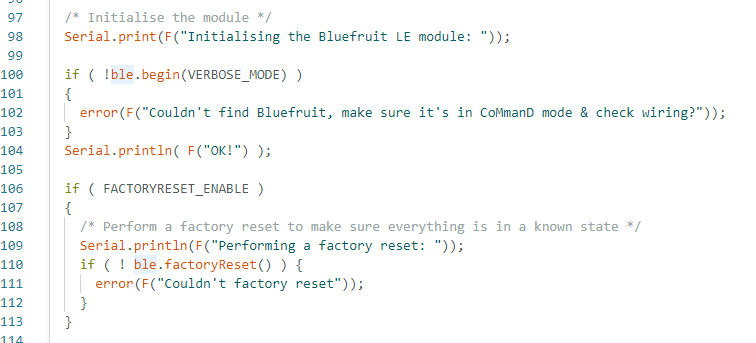
The usual BLE initialization code is written here.
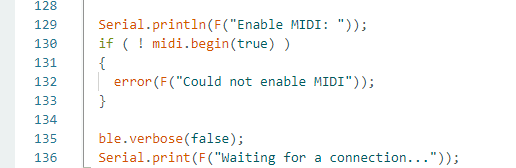
Of particular interest here is how to begin the midi object through the midi.begin() statement
SENDING MIDI NOTE MESSAGES
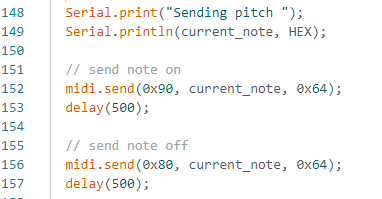
Here, the actual MIDI messages are sent through the midi.send() command. The parameters include a status (examples of such are Note ON – 0x90, Note OFF – 0x80, or a Control Change Message – 0xB0 and others) and several data bytes. For a Note ON or OFF, the first data byte is the actual note itself (from 0 to 127), while the second data byte is the velocity or how fast you pressed the key (from 0 to 127). For a Control Change, the first data byte is the controller type (0-127) and then followed by the controller value (0-127). You can use the control change to control functions in a synthesizer.
The current note is simply incremented one by one inside the loop. As the midi notes are sent, a receive function BLEMidiRx() displays the notes serially. Open the serial monitor to view this.
Download the necessary mobile apps for the BLE MIDI function
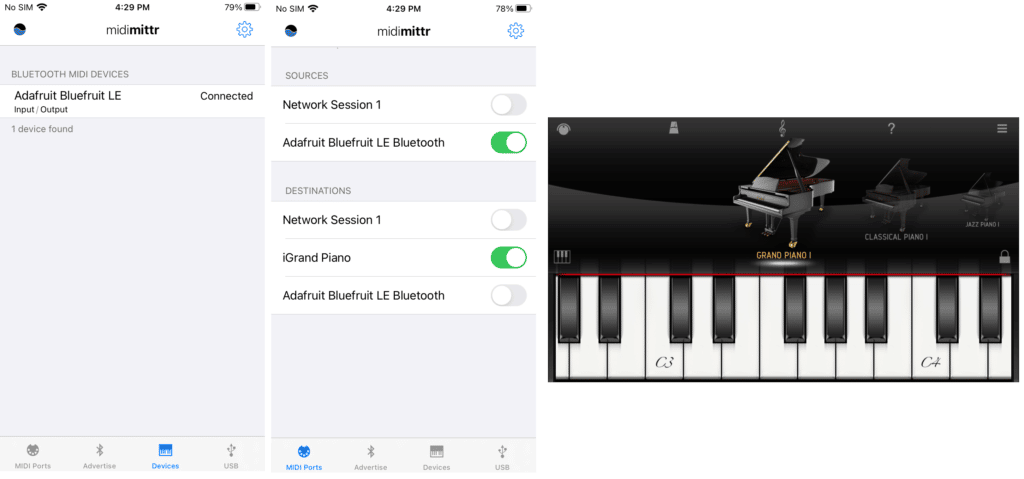
The midimittr app (MIDI over Bluetooth) and the Grand piano app (synthesizer) in the Appstore will work hand in hand to hear the MIDI messages coming from your Bluefruit Feather. Midimittr has the capability to route the MIDI messages to another application such as the iGrand Piano which turns the messages into actual sounds.
First, connect your Adafruit Bluefruit LE to the midimittr app. Next, Open the iGrand Piano. Now go back to midimittr and make sure that the sources and destinations are met accordingly. You should hear the piano sounds afterward.