Introduction
TC or “Real-Time Clock” ICs are essential for timekeeping. These little IC chips are low-power and can satisfy your timekeeping needs very accurately for years if provided with a simple little 3V battery.
The RTCs provide seconds, minutes, hours, day, date, month, and year information. The end of the month date is automatically adjusted for months with fewer than 31 days, including corrections for leap year. The clock operates in either the 24-hour or 12-hour format with AM/PM indicator. The DS1307 has a built-in power sense circuit that detects power failures and automatically switches to the backup supply. Timekeeping operation continues while the part operates from the backup supply.
You can make your own digital clock, alarm clock or anything else you can imagine that involves timekeeping using this!
Components
- DS1307
- 10k ohm resistors
- 32.768kHz Quartz Crystal
- Arduino
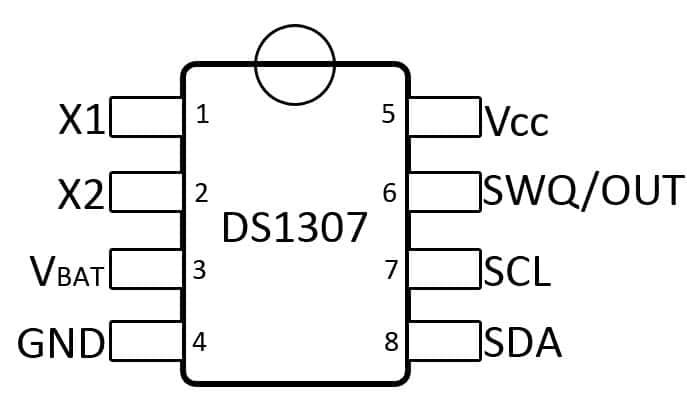
The DS1307
Circuit Diagram
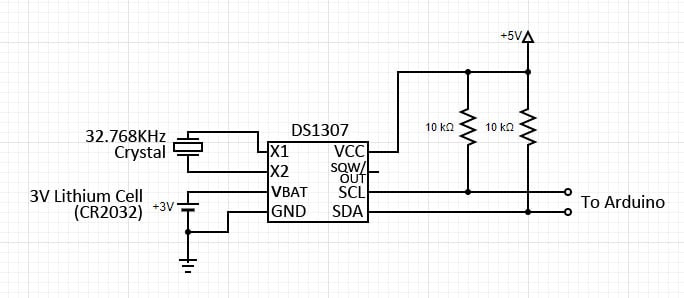
Now connect to following pins of DS1307 with the corresponding pins of Arduino:
- SDA to A4
- SCL to A5
RTCLIB Library
To make our life easier with everything, we use the RTClib library which takes responsibility for all the complex coding parts and provides us with easier to read/write/understand the coding environment.
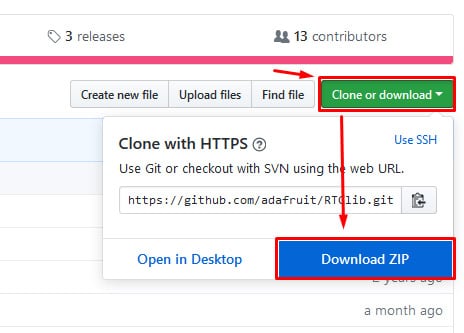
Navigate to this link: https://github.com/adafruit/RTClib
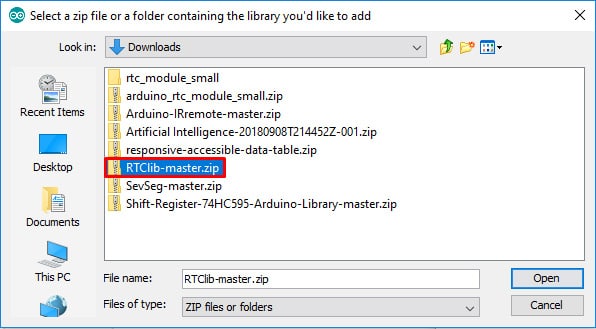
- Download the library:
- Navigate you Sketch > Include Library > Add .Zip Library
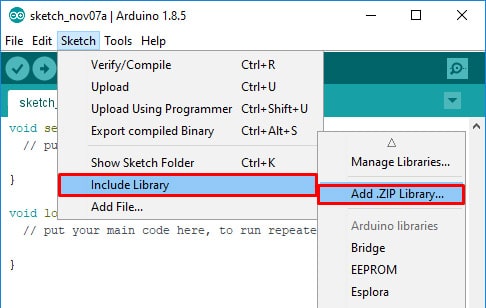
- Select the downloaded Library File
The Code
					// Date and time functions using a DS1307 RTC connected via I2C and Wire lib
#include <Wire.h>
#include "RTClib.h"

RTC_DS1307 rtc;

char daysOfTheWeek[7][12] = {"Sunday", "Monday", "Tuesday", "Wednesday", "Thursday", "Friday", "Saturday"};

void setup () {
  Serial.begin(57600);
  if (! rtc.begin()) {
    Serial.println("Couldn't find RTC");
    while (1);
  }

  if (! rtc.isrunning()) {
    Serial.println("RTC is NOT running!");
    // following line sets the RTC to the date & time this sketch was compiled
     rtc.adjust(DateTime(F(__DATE__), F(__TIME__)));

    // This line sets the RTC with an explicit date & time, for example to set
    // January 21, 2014 at 3am you would call:
    // rtc.adjust(DateTime(2018, 07, 10, 3, 51, 3));
  }
}

void loop () {
    DateTime now = rtc.now();

    Serial.println("The current Date and Time is: ");
    Serial.print(now.day(), DEC);
    Serial.print('/');
    Serial.print(now.month(), DEC);
    Serial.print('/');
    Serial.print(now.year(), DEC);
    Serial.print("  ");
    Serial.print(now.hour(), DEC);
    Serial.print(':');
    Serial.print(now.minute(), DEC);
    Serial.print(':');
    Serial.print(now.second(), DEC);
    Serial.println();

    Serial.println();
    delay(3000);
}
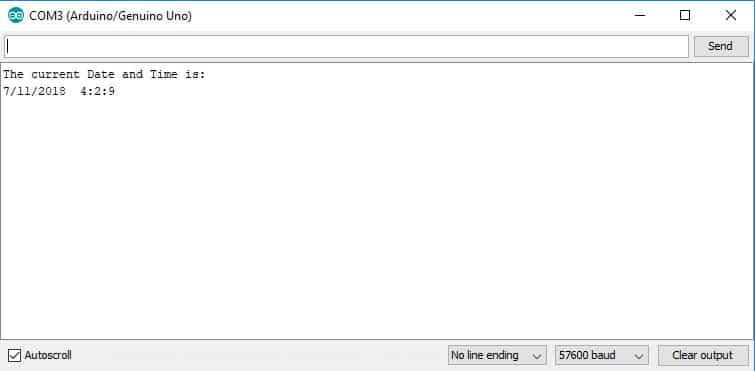
After uploading, open the serial monitor and you should see it telling you the time.
As the Arduino is providing you with Time, you can easily interface it using an LCD display or using 7-segment displays.