Phipps Electronics

Order within the next 

FREE SHIPPING OVER $199

50,000+ ORDERS

WORLDWIDE SHIPPING

SSL SECURED

Using the Infrared Receiver Sensor KY-022 with Arduino

Contents

Introduction:

In this tutorial, we will learn about the KY-022 module, what is an IR receiver and we will build a simple project using the KY-022 module and an Arduino.

Infrared Receiver Sensor KY-022:

The KY-022 Module will be our main component for this tutorial. This module has an 1838 IR receiver mounted on a breakout board with an LED and resistor. Figure 1 shows the module as seen in fritzing.

Figure 1: KY-022 Infrared Receiver Sensor

Pin Out:

The KY-022 module has three pins.

Component PinDescription
(-)GND
middle+5V
SSignal

What is a IR receiver?

An IR receiver is a photo-diode that receives infrared signals from an IR source. An IR receiver accepts infrared pulses which are then decoded to represent bytes of data.

Project:

Arduino IR Decoder:

After learning about the KY-022 module and the DS18B20 IC, it is now time to build a project using the module. Our project will use the KY-022 module to receiver IR pulses, decode the information and display it on the serial monitor.

Components:

For this project, we need the following components:

  • Arduino Uno board (1 pc.)
  • KY-022 Infrared Receiver Sensor (1 pc.)
  • Jumper wires

Wiring Diagram:

Figure 2: Connection Diagram

The KY-022 module pins are connected to the Arduino Uno board as follows:

Component PinArduino Uno board Pin
(-)GND
middle+5V
S2

IRremote Library:

We will simplify our code by using the IRremote library. To install it to your Arduino IDE, open your Library Manager and search & install “IRremote” by shirriff.

Figure 3: IRremote library

Code:

Below is the Arduino sketch for our project. I have added comments to explain important parts of the code. Save the code as KY-022.ino and upload it to your Arduino board.

				
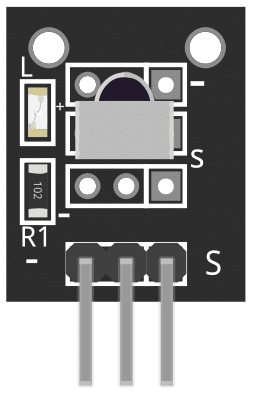
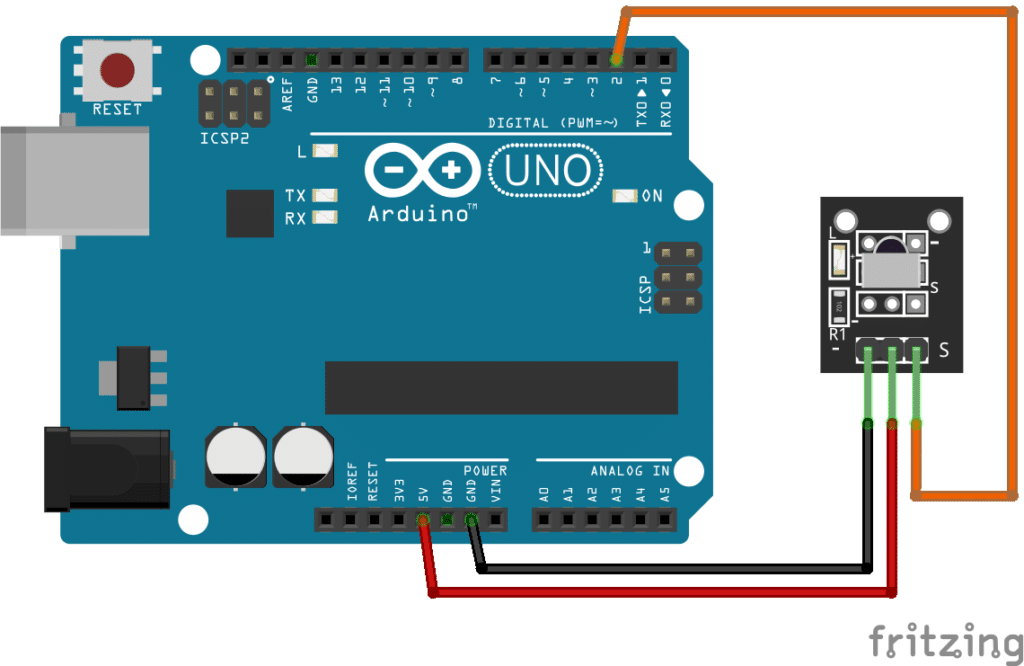
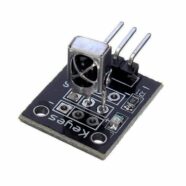
					// Arduino and KY-022 module
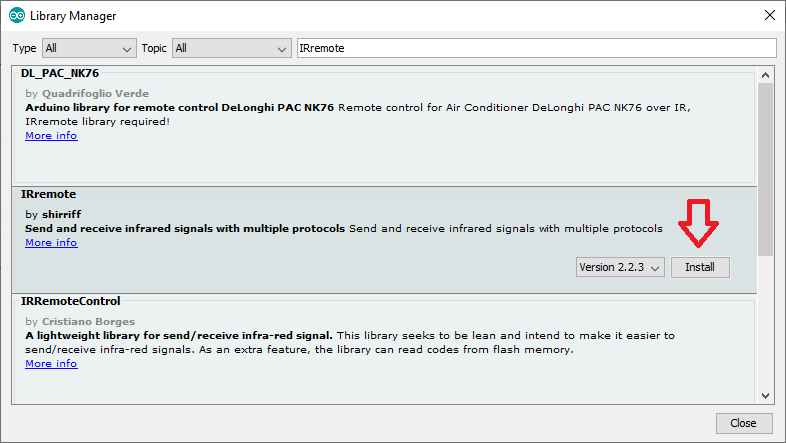
#include <IRremote.h>
IRrecv irrecv(2);      // IR module is connected to pin 2
decode_results results; // create a variable of type decode_results
void setup() { 
  Serial.begin(9600); 
  irrecv.enableIRIn(); // initialize irrecv
} 
void loop() { 
  if (irrecv.decode(&results)) {
    Serial.println(results.value, HEX);   // get and decode IR pulses received by the module
    irrecv.resume();                      // get the next value
  }
  delay (100);    // wait 100 milliSeconds
}


Project Test:

Apply power to your Arduino Uno board and open the Serial Monitor in the Arduino IDE. Arduino will decode the IR signals received from the IR module and display it on the serial monitor.

SUBSCRIBE FOR NEW POST ALERTS

Subscribe to be the first to know when we publish a new article!
List Subscriptions(Required)

POPULAR POSTS

Scroll to Top