Introduction
In this tutorial, we will learn about the KY-008 module, what is a laser and we will build a simple project to build a blinking laser point using the KY-008 module and an Arduino.
Laser Transmitter Module KY-008
The KY-008 Module will be our main component for this tutorial. This module has a 650nm red laser diode and mounted on a breakout board with a resistor. Figure 1 shows the module as seen in fritzing.
Pinout
The KY-008 module has three pins.
Component Pin | Arduino Uno board Pin |
---|---|
(-) | GND |
middle | No Connection |
S | Signal |
What is a Laser?
The term “laser” is an acronym for “Light Amplification by Stimulated Emission of Radiation”. It produces a coherent light by focusing the light in a tight spot.
Note: Lasers can damage eyesight, do not look directly into the laser diode.
Project - Arduino Blinking Laser Pointer
After learning about the KY-008 module and the laser diode, it is now time to build a project using the module. Our project will be a blinking laser point using the KY-008 module and an Arduino.
Components
For this project, we need the following components:
- Arduino Uno board (1 pc.)
- KY-008 Laser Transmitter Module (1 pc.)
- Jumper wires
Wiring Diagram
Figure 2 shows the connection between the Arduino Uno and the KY-008 Laser Transmitter Module.
The KY-008 module pins are connected to the Arduino Uno board as follows:
Component Pin | Arduino Uno board Pin |
---|---|
(-) | GND |
middle | No Connection |
S | 8 |
The Code
Below is the Arduino sketch for our project. I have added comments to explain important parts of the code. Save the code as KY-008.ino and upload it to your Arduino board.
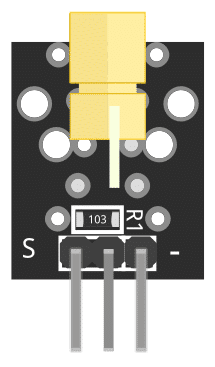
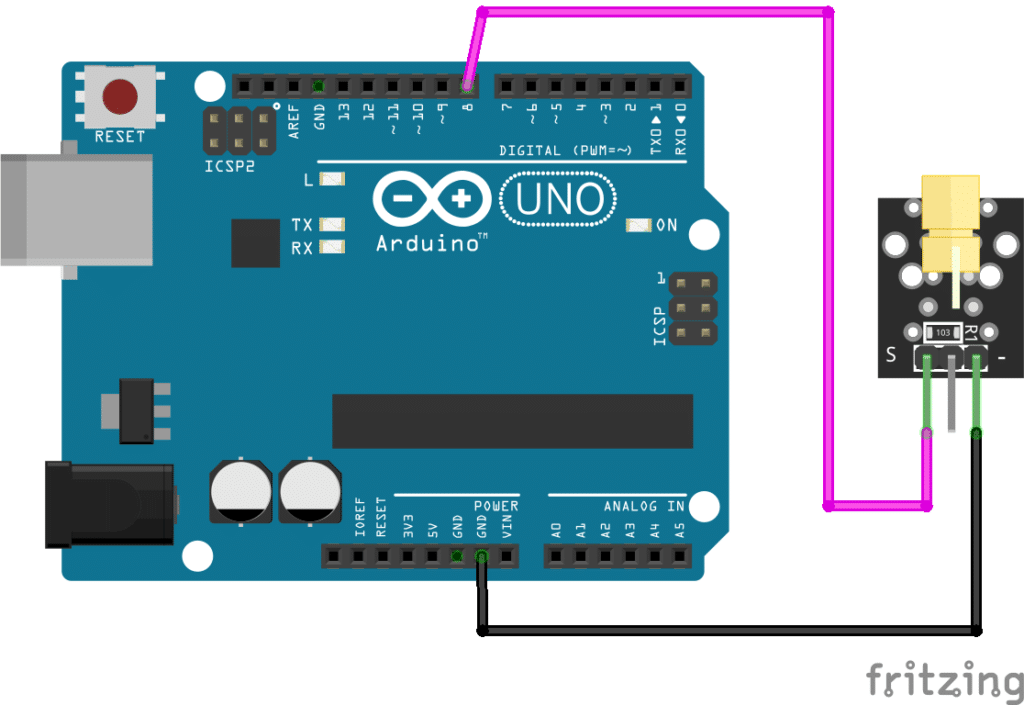
// Arduino and KY-008 module
void setup() {
pinMode(8, OUTPUT); // set pin 8 to OUTPUT
}
void loop() {
digitalWrite(8, HIGH); // switch on module connected to pin 8
delay(500); // wait 0.5 sec
digitalWrite(8, LOW); // switch off module
delay(500); // wait 0.5 sec
}
Project Test
Apply power to your Arduino Uno board. The laser module with alternate between on and off every 0.5 sec.