In this tutorial, we will learn about the KY-018 module, what is a photoresistor and we will build a simple project using a KY-018 module and an Arduino.
Photoresistor Module KY-018
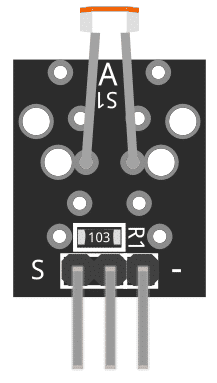
The KY-018 Module will be our main component for this tutorial. This module has a photoresistor and mounted on a breakout board with a 10K resistor. Figure 1 shows the module as seen in fritzing.
Figure 1: KY-018 Photoresistor Module
Pin Out:
The KY-018 module has three pins.
Component Pin
Description
(-)
GND
middle
+5V
S
Signal
What is a Photoresistor?
A photoresistor is a kind of electronic component wherein the resistance is affected by ambient light. Its resistance decreases when the light intensity increases.
Project:
Arduino Light Intensity Meter:
After learning about the KY-018 module and the photoresistor, it is now time to build a project using the module. Our project will read the analog input from the KY-018 module and display it on the serial monitor.
Components:
For this project, we need the following components:
Arduino Uno board (1 pc.)
KY-018 Photoresistor Module (1 pc.)
Jumper wires
Wiring Diagram:
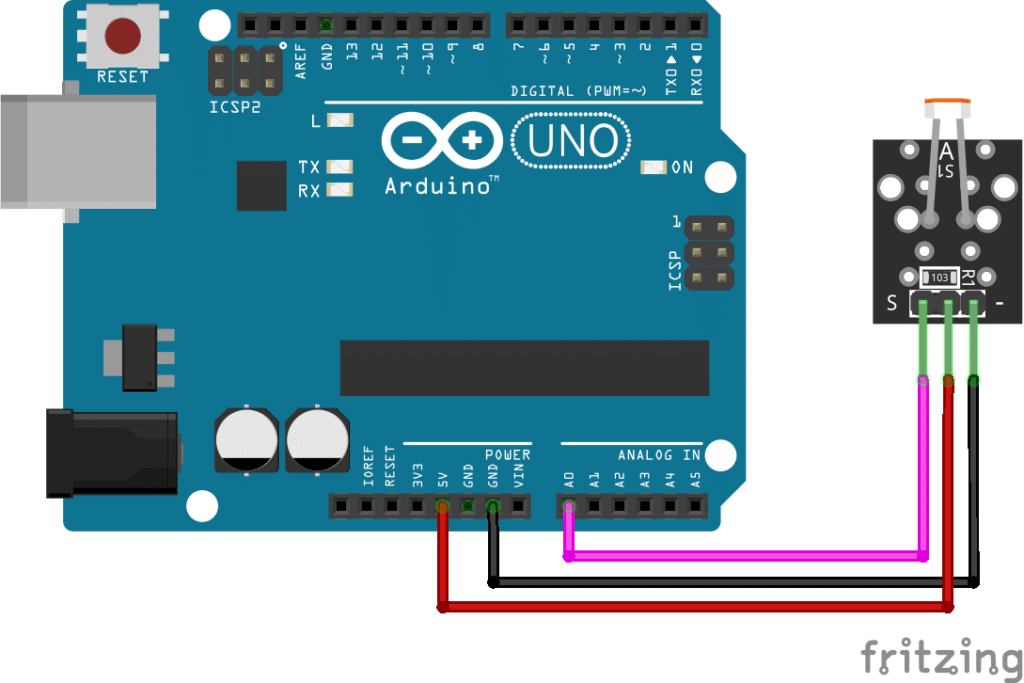
Figure 2 shows the connection between the Arduino Uno and the KY-018 Photoresistor Module.
Figure 2: Connection Diagram
The KY-018 module pins are connected to the Arduino Uno board as follows:
Component Pin
Arduino Uno board Pin
(-)
GND
middle
+5V
S
A0
Code:
Below is the Arduino sketch for our project. I have added comments to explain important parts of the code. Save the code as KY-018.ino and upload it to your Arduino board.
					// Arduino and KY-018 module
void setup() {
  Serial.begin(9600); // initialize serial monitor
}
void loop() {
  Serial.println(analogRead(A0)); // send analog input to serial monitor
}
Project Test:
Apply power to your Arduino Uno board and open the Serial Monitor in the Arduino IDE. Arduino will read analog input from pin A0 and display the value to the serial monitor.