#include <IRremote.hpp>
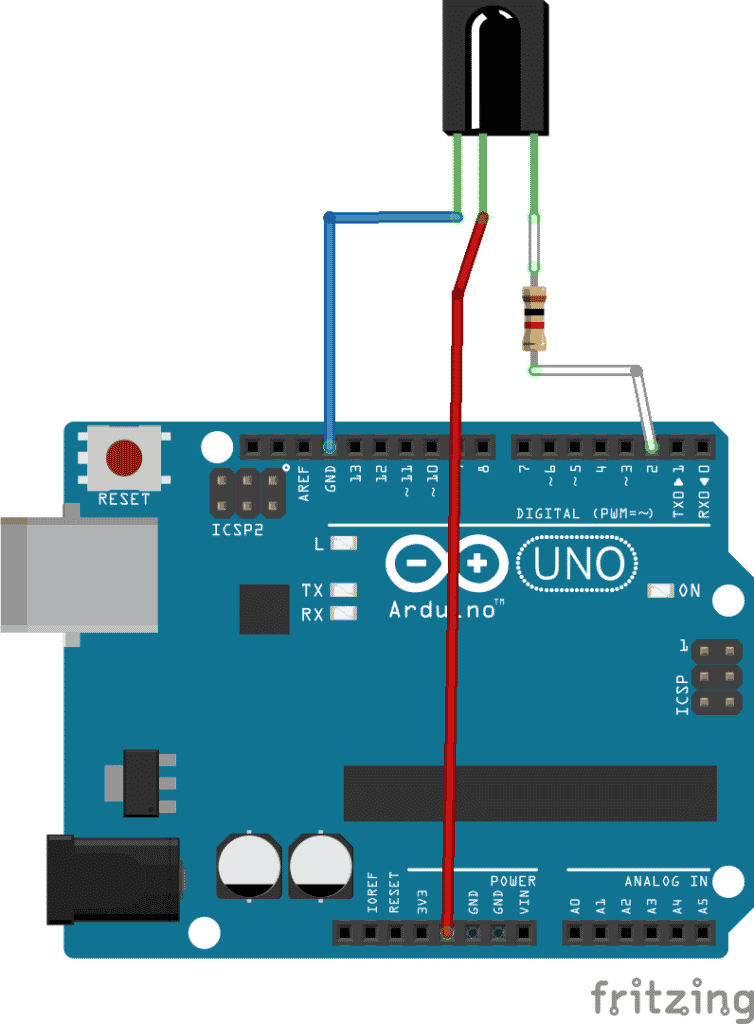
#define IR_RECEIVE_PIN 2
void setup()
{
pinMode(LED_BUILTIN, OUTPUT);
Serial.begin(115200);
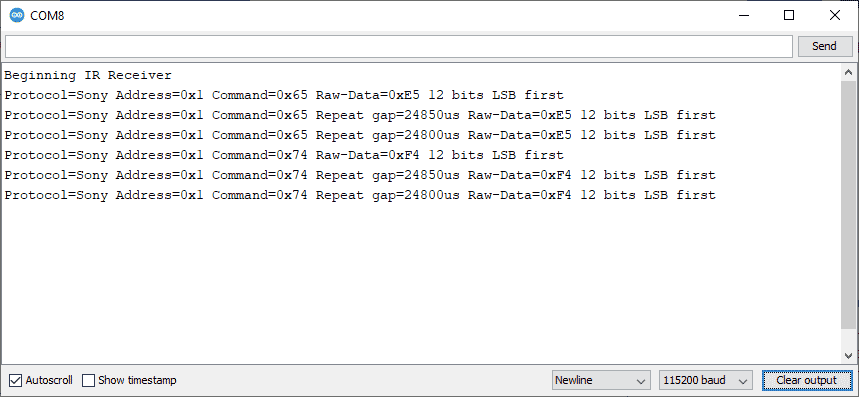
Serial.println("Beginning IR Receiver");
IrReceiver.begin(IR_RECEIVE_PIN, DISABLE_LED_FEEDBACK); // Start the receiver
}
void loop() {
if (IrReceiver.decode()) {
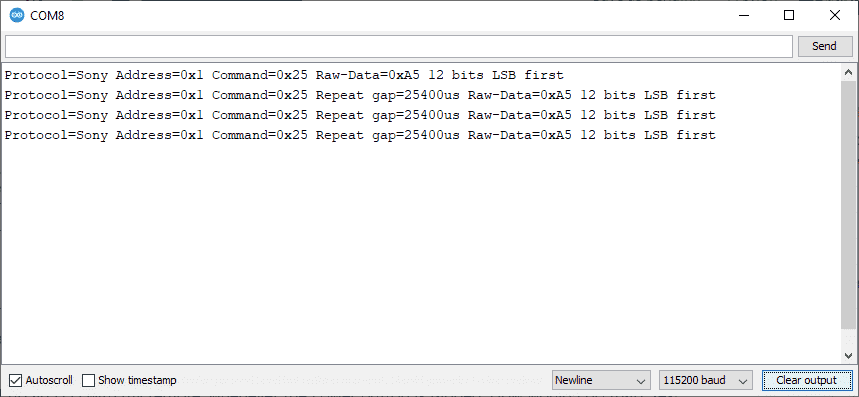
IrReceiver.printIRResultShort(&Serial);
IrReceiver.resume(); // Enable receiving of the next value
/*
* Finally, check the received data and perform actions according to the received command
*/
if (IrReceiver.decodedIRData.command == 0x74) {
// do something
digitalWrite(LED_BUILTIN, HIGH);
}
}
}