Introduction
The Raspberry Pi is a popular and widely used credit-card-sized single-board computer. The Pi is cheap and affordable, making it an excellent choice for science, engineering and robotics projects, as well as applications that require more computational power than standard 8-bit microcontroller architectures.
The Raspberry pi can do almost every everyday tasks that a desktop/laptop computer can do. However, it still has heating problems and other limitations. The latest release, Raspberry Pi 4, is an extremely powerful board, and won’t be long until we have such single board computers powerful enough to replace our regular computers.
Often after purchasing the Raspberry Pi, the user is faced with the dilemma of it not having a display and only having provision for an HDMI output. Purchasing a dedicated display for the Pi can be expensive and unjust considering it would likely cost 3 – 4 times the cost of the Pi itself.
This problem can easily be overcome by screen mirroring. We can connect the Raspberry Pi with laptops or desktops very easily and mirror the Raspberry Pi’s screen on your laptop/desktop screen.
Mirroring is possible over Wifi and Ethernet cable, With both ways demonstrated below. However, using an Ethernet cable is recommended as that gives you better performance and experience.
Components
Hardware
- Raspberry Pi
- Laptop / Desktop
- HDMI Cable
- Ethernet Cable (Optional)
- WiFi
- External HDMI Display (Needed to initially setup the Raspberry Pi)
Software
- VNC Viewer
Setting up the Raspberry Pi
Assuming the Operating System has already been installed on the Raspberry Pi, If not, please view Setting up Raspbian Operating System for Raspberry Pi.
To configure the Raspberry Pi we will first need to connect it to an HDMI compatible monitor/display such as a TV for example with an HDMI cable.
After connecting to a display and powering the Pi on, you should see the startup screen.

Once all loaded, open the terminal window by clicking the black icon at the upper-left.
Once the terminal window is open, type the following commands:
sudo apt-get update
This command updates your apt-get package.
sudo apt-get install tightvncserver
This command installs VNCserver on your Raspberry Pi.
After installing the VNC server application, you need to configure the Pi so that we can connect to it.
For that purpose, type in the following to your terminal:
vncserver:1
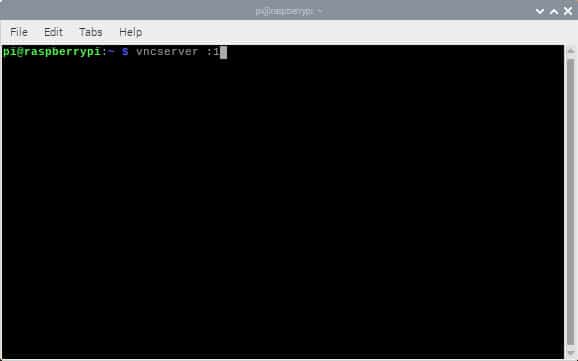
After typing this, a prompt will appear for a password. Type in a password you desire, confirm your password and type ‘n’ for the read-only password option.
The VNC server is now up and running. However, if we turn off the Raspberry pi, the service will stop and not restart until we manually do so. But we always want this running so that we can connect to it all the time. So, we need to add VNC server to startup. For that,
go to file system-
Make sure that the hidden files are visible, and you are at “/home/pi” directory.
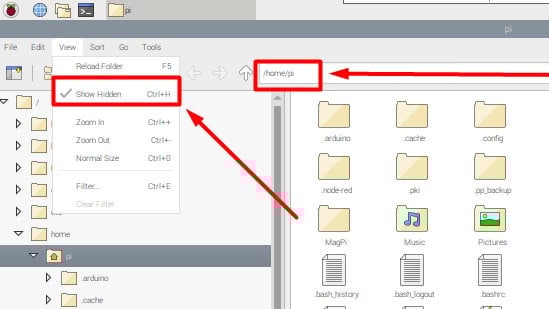
Now enter the “.config > autostart” folder. Right click and go to “Create New”> “Empty File“.
Create a file named “tightvnc.desktop“.

Now double click to open the file and copy and paste the following text in it –
					[Desktop Entry]
Type=Application
Name=TightVNC
Exec=vncserver :1
StartupNotify=False
Save and exit the file.
All the work on the Raspberry Pi is complete.
Laptop / Desktop Setup
To connect to the Raspberry Pi we need a VNC client, for this demonstration, we will using Real VNC which can be downloaded at the following link – https://www.realvnc.com/
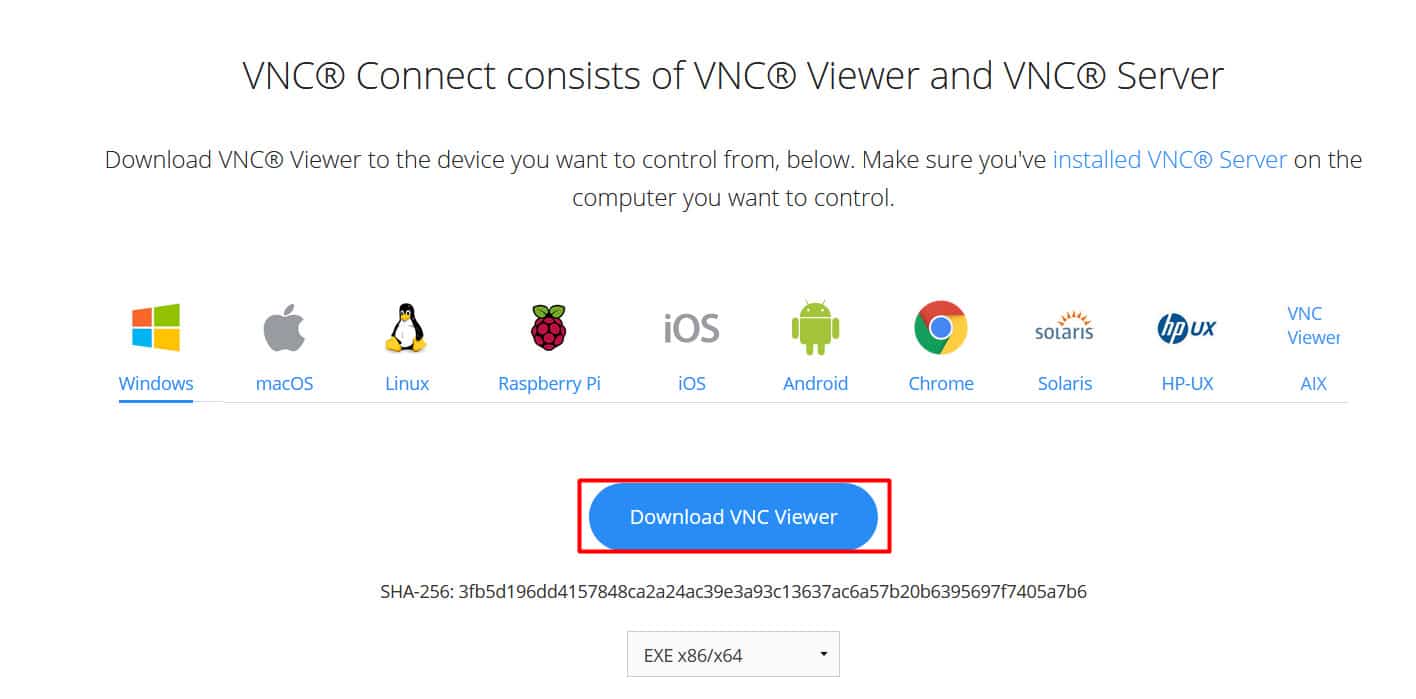
After downloading, install the software.
Now, we can connect/mirror our Raspberry Pi to our computer/laptop display over ethernet or WiFi, as explained below.
Connecting via Ethernet Cable
Open the command prompt window on your computer and type:
arp -a
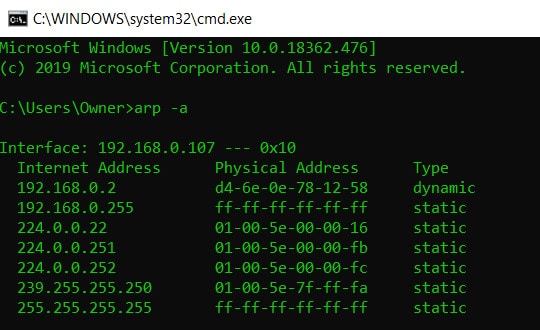
Now, connect an Ethernet cable from your computer to the Raspberry Pi and power the Pi and wait for it to start.
Once started, type “arp –a” in the command prompt again.
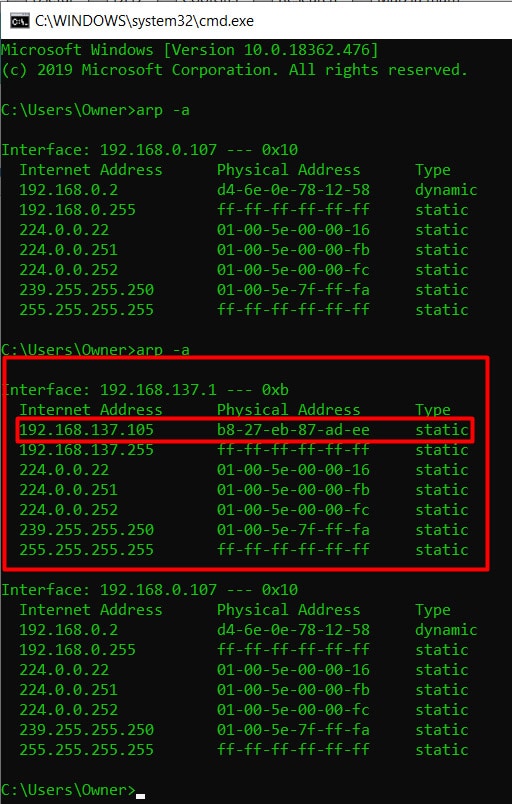
A section will appear under a new IP address. From that new section, copy the first IP address.
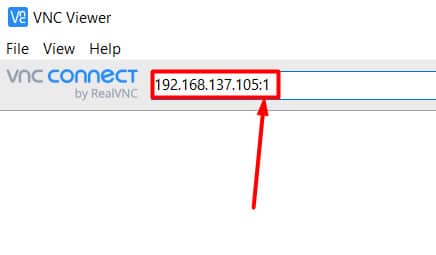
Now open VNC viewer and type in the IP address. Add “:1” at the end of the IP address, then press Enter.
Upon tapping enter, you should see something like this –
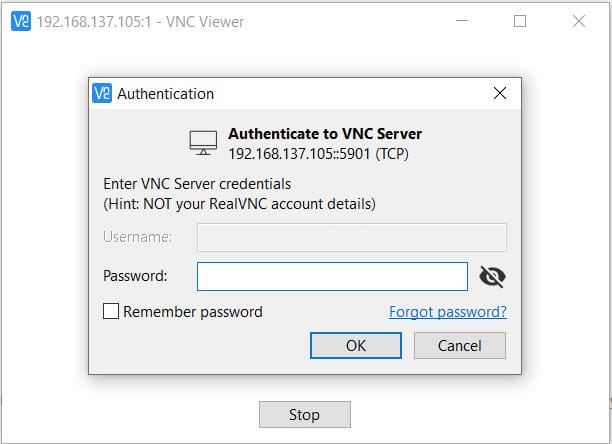
Now enter the password you set while configuring the Raspberry Pi side.
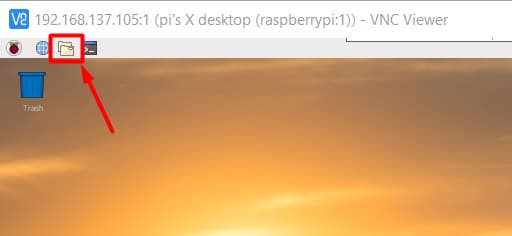
Tap enter and your Raspberry Pi screen should appear in a window like this –

Connecting Over WiFi
Before performing this task, the Raspberry Pi needs to have been preconfigured to connect to the wireless router automatically.
First, open your Router page. If you don’t know how to do that, open command prompt and type in “ipconfig“.
Find and copy the “default gateway” and open that in your web browser.
After opening the router page, open “DHCP” and open the client list. This page lists all the devices currently connected to your router.
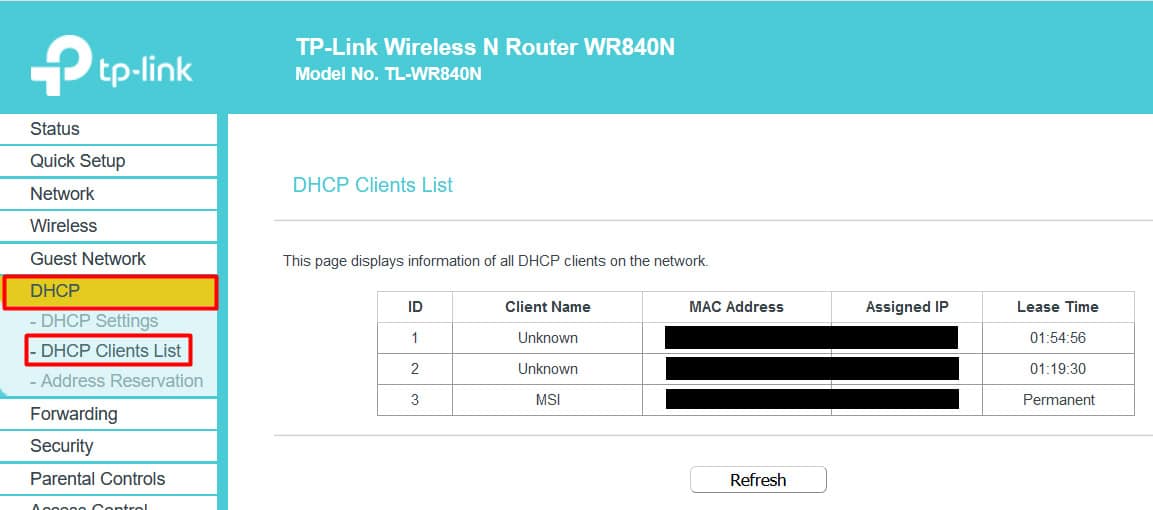
Power on the Raspberry pi, which should automatically connect to your wifi upon startup.
Refresh the DHCP list page and you should see your Raspberry Pi listed.
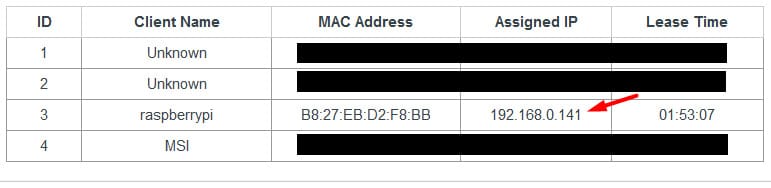
Copy the IP address the Raspberry Pi has and put that in your VNC Viewer. Add “:1” at the end of the IP address like this –
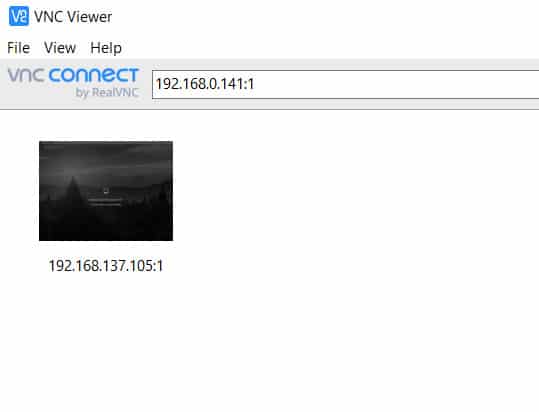
When this appears, enter the password you had set while configuring the raspberry pi side.

Upon tapping enter, you should see the Raspberry Pi screen.
You have now connected to your Raspberry Pi.


