Check out this easy-to-make ESP32 voice assistant utilizing the Xiaozhi AI Chatbot.
Introduction
Last time, you learned about DIY hardware voice assistants. Constructing a voice assistant is not a trivial task. You have to build hardware and firmware for it. You may also have to take care of some back-end server stuff, which probably means learning Python or another high-level programming language. Also, learning to code structured protocols such as HTTP, JSON, MQTT, or MCP. With this, some hobbyist may find it cumbersome to make their own voice assistant.
Fortunately, some of the intricacies of building a voice assistant have been taken cared of by using an online back-end server called the Xiaozhi-ESP32-Server.
What is the Xiaozhi-ESP32-Server?
The Xiaozhi-ESP32-Server is an open-source backend service developed by a group of researchers from South China University of Technology. It can do conversational interactions, multilingual recognition, voice or vision-based AI systems, Large Language model interaction, and even IoT integration.
You can also integrate it with AI models such as LLMs (Large Language Models) compatible with OpenAI (ChatGLM, Doubao, Qwen, AliLLM). The AI models also include TTS (Text-to-Speech) and ASR (Automatic-Speech-Recognition). It can also do local offline AI (through Olama, Dify, Xinference). With ASR and local offline AI, you can integrate wake word detection through hardware. Not limited to language models, Xiaozhi can also do VLLMs (Visual Language Models), ready for your hardware camera using ChatGLM-VLLM, Qwen-VL.
Xiaozhi-ESP32 supports several communication protocols, such as WebSocket, MQTT, MCP, and UDP. Additionally, it can also integrate with Home Assistant and other automation platforms (through MQTT or API calls)
How to Use Xiaozhi-ESP32-Server
Set Up Hardware
First, set up your hardware. This is for the ESP32-DevKit-C1. Like what you did in the ESP32 Voice Recorder, you need an INMP441 microphone and a MAX98357A DAC. Additionally, this time, it’s best to add an OLED display module for visual contexts.
ESP32-DevKit-C1
INMP441 I2S Microphone Module
MAX98357A DAC Module
2 Tact SW Push Buttons – volume control
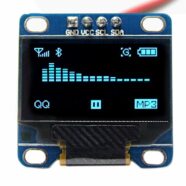
OLED Display (128×64) – I2C
Breadboard
Connecting Wires
ESP32-S3-DevKit-C1
INMP441 (Microphone)
GPIO4
WS (Data Select)
GPIO5
SCK (Data Clock)
GPIO6
SD (Data Output)
3V3
VDD (Power Positive 3.3V)
GND
GND
GND
L/R (Left/Right Channel)
ESP32-S3-DevKit-C1
Amplifier(MAX98357A)
GPIO7
DIN (Digital Signal)
GPIO15
BCLK (Bit Clock)
GPIO16
LRC (Left/Right Clock)
3V3
Vin/VCC (Power)
GND
GND (Ground)
3V3
SD (Shutdown Channel)
GND
GAIN (Gain and Channel)
ESP32-S3-DevKit-C1
SSD1306 OLED (128x64)
GPIO41
SDA
GPIO42
SCL
3v3
VCC
GND
GND
ESP32-S3-DevKit-C1
Tact Switch
GPIO39
Volume Down / Mute (to Ground. Long Press to Mute)
GPIO40
Volume Up (to Ground)
Download the Firmware on your ESP32-S3
With Xiaozhi-ESP32, you don’t necessarily have to dabble with firmware code because there is stock firmware available. You don’t even need to hard-code your WiFi SSID username and password (as you do in Arduino IDE). These parameters are passed through at run-time via the WiFi-AP mode on your smartphone or browser. Xiaozhi-ESP32 also has an easy-to-use front-end web interface, helping you work with all the complicated back-end parameters instead of coding them. You can modify firmware settings later (wake word, language, etc.) by going through Xiaozhi ESP32 Programming and Configuration.
Pick your ESP32 variant (ESP32-S3), WorkMode: Develop, LoadMode: UART
Pick your binary file (English version — wake word = Sophia (for now)) merged-firmware.bin and choose @ 0x00 address. Don’t forget to click the checkbox. You can modify firmware settings later (wake word, language, etc.) by going through Xiaozhi ESP32 Programming and Configuration.
Choose the correct COM port in COM.
Click ERASE to erase any existing firmware on your ESP32-S3.
Click START to download firmware.
After finishing the download, press the reset button of the module to restart the device.
The device then waits for its WiFi to be configured from your smartphone or browser.
Enter Wi-Fi Credentials using your smartphone/browser as the Access Point
Connect to the Xiaozhi-XXXX access point on your smartphone through WiFi.
Enter/Choose your WiFi router’s SSID and password.
The device should restart or press the reset button.
Activate the device through the Xiaozhi AI web console
You should see and hear your activation/verification code displayed in the OLED display of your device.
You’ll need to register first. Use your phone credentials/google account and then log in.
Now click +Add Device and then enter your verification code.
Start using the Open Source version.
Configure your Chat Agent
Configure your chat agent according to your liking. Below is a known configuration that works. Save it.
Reset device to take effect.
Test your Device
Now that you’ve configured your chat agent, you can test actual conversions with your AI companion. The wake word to use is Sophia. Currently the wake word is hardcoded on firmware. Sophia is also the name of your chat agent.