Wanting to implement digital audio on your ESP32-S3? Learn more about running I2S on an ESP32S3 dev board through this ESP32 I2S audio tutorial.

Introduction
Last time, you learned about the basics of I2S through Introduction to I2S Audio. This time, you can implement the full I2S protocol on the ESP32-S3. The ESP32-S3 has two hardware I2Ss, namely I2S0 and I2S1, which can stream digital media and are especially suited for multimedia audio applications. Below is the hardware block diagram of the ESP32-S3 I2S.

As was discussed in the Introduction to I2S Audio, there are three main lines for I2S. These are:
- BCK – Bit clock Signal (or SCK)
- WS – Channel/Word Select Signal
- SD – Serial Data signal (Input or Output)
So, you have to connect these necessary I2S lines of your ESP32-S3 accordingly. As examples, here is an I2S microphone (INMP441) and a digital audio amplifier (MAX98357A) connected to an ESP32-S3.
| INMP441 Pin | ESP32-S3 Pin | Function |
|---|---|---|
| VCC | 3.3V | Power supply (3.3V only) |
| GND | GND | Ground |
| SCK (BCLK) | GPIO 47 | I2S Bit Clock (BCLK) |
| WS (LRCLK) | GPIO 10 | I2S Word Select (LRCLK) |
| SD (DOUT) | GPIO 21 | I2S Serial Data Input (from mic) |
| L/R | GND | Left Channel Mic Select |
| MAX98357A Pin | ESP32-S3 Pin | Function |
|---|---|---|
| VIN | 3.3V or 5V | Power supply (supports both) |
| GND | GND | Ground |
| BCLK | GPIO 2 | I2S Bit Clock |
| LRCLK | GPIO 1 | I2S Word Select (Left/Right Clock) |
| DIN | GPIO 38 | I2S Data Output from ESP32 |
| GAIN | GND | Sets output gain 12 dB |
| SD | GPIO 4 | Optional shutdown control |
Here, the Gain pin is set to GND, indicating a gain of 12dB. The SD (Shutdown) pin can be assigned to any free GPIO port, so you can disable the speaker output.

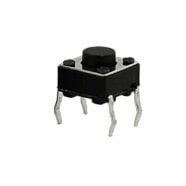
An optional push button is added for future use.

Sampling Characteristics of I2S
I2S samples audio data. With this, you should be ready with details about your preferred Sample Rate, Bit Resolution, and Number of Audio Channels involved. These parameters will help you determine the actual I2S clock speed (SCK/BCK). The formula for determining the I2S clock is:
BCK = Sampling Rate * Bit resolution * Number of Channels
So, for example, if you want to record or transmit CD-quality audio, you may need parameters similar below:
Sampling Rate = 44100 Hz
Bit Resolution = 16 bits
Channels = x2 (Stereo)
To get a BCK of about 1.4 MHz
BCK = 44100Hz * 16 Bits * 2 Channels = 1411200 Hz
Now that you’ve learned the signals and parameters to use for I2S, you’re ready to code firmware.
Sample Code for the MAX98357A
Below is a sample code that generates a tone based on a waveform on the MAX98357A digital audio amp. The waveform generated is a triangular wave.
					#include <driver/i2s.h>

#define I2S_SPK_BCLK 2
#define I2S_SPK_LRC  1
#define I2S_SPK_DOUT 38

#define I2S_SD_SPK 4
#define I2S_SPKR_PORT I2S_NUM_0

#define BUTTON 12

const int sampleRate = 44100;     // Hz
const int frequency = 1000;       // Hz
const int amplitude = 1000;       // -amplitude +amplitude
const int samplesPerCycle = sampleRate / frequency;

int16_t waveBuffer[samplesPerCycle];  // store 1 cycle of triangular wave

void generateTriangularWave() {
  for (int i = 0; i < samplesPerCycle; ++i) {
    float phase = (float)i / samplesPerCycle;
    float value = (phase < 0.5) ? (2 * phase) : (2 * (1 - phase));
    waveBuffer[i] = (int16_t)((value * 2 - 1) * amplitude); // Scale to [-amplitude, amplitude]
  }
}

void setupI2S() {
  const i2s_config_t i2s_config = {
    .mode = (i2s_mode_t)(I2S_MODE_MASTER | I2S_MODE_TX),
    .sample_rate = sampleRate,
    .bits_per_sample = I2S_BITS_PER_SAMPLE_16BIT,
    .channel_format = I2S_CHANNEL_FMT_ONLY_LEFT,
    .communication_format = I2S_COMM_FORMAT_I2S_MSB,
    .intr_alloc_flags = ESP_INTR_FLAG_LEVEL1,
    .dma_buf_count = 8,
    .dma_buf_len = 32,
    .use_apll = false,
    .tx_desc_auto_clear = true,
    .fixed_mclk = 0
  };

  const i2s_pin_config_t pin_config = {
    .bck_io_num = I2S_SPK_BCLK,
    .ws_io_num = I2S_SPK_LRC,
    .data_out_num = I2S_SPK_DOUT,
    .data_in_num = I2S_PIN_NO_CHANGE
  };

  i2s_driver_install(I2S_SPKR_PORT, &i2s_config, 0, NULL);
  i2s_set_pin(I2S_SPKR_PORT, &pin_config);
}

void setup() {
  Serial.begin(115200);

  pinMode(BUTTON, INPUT_PULLUP);  // start stop button
  pinMode(I2S_SD_SPK, OUTPUT);    // SPKR Shutdown Pin

  generateTriangularWave();       // traingle wave 1-cycle function
  setupI2S();
}

uint8_t toggle = 0;

void loop() {

  size_t bytesWritten;

  if(digitalRead(BUTTON) == 0){
    delay(300);   // debounce
    toggle ^= 1;
    Serial.println("Button Pressed");

    if(toggle){
      Serial.println("Audio ON");
      digitalWrite(I2S_SD_SPK, HIGH); // turn ON speaker
    }else{
      Serial.println("Audio OFF");
      digitalWrite(I2S_SD_SPK, LOW);  // turn OFF speaker
    }
  }

  // write I2S data to DMA (1 Traingular Wave cycle)
  if(toggle){
    if(i2s_write(I2S_NUM_0, waveBuffer, sizeof(waveBuffer), &bytesWritten, portMAX_DELAY) == ESP_OK){
      Serial.print("OK"); Serial.println(bytesWritten);
    }else{
      Serial.println("Failed");
      while(1);
    }

  }

}
The triangle wave is based on the generateTriangularWave() function. This function generates one full cycle of a triangular wave with a 16-bit resolution.
					void generateTriangularWave() {
  for (int i = 0; i < samplesPerCycle; ++i) {
    float phase = (float)i / samplesPerCycle;
    float value = (phase < 0.5) ? (2 * phase) : (2 * (1 - phase));
    waveBuffer[i] = (int16_t)((value * 2 - 1) * amplitude); // Scale to [-amplitude, amplitude]
  }
}
The include file is the <driver/i2s.h>, which is an ESP-IDF type header. The definitions of the pins are also included, together with the waveform sample parameters.
					#include <driver/i2s.h>

#define I2S_SPK_BCLK 2
#define I2S_SPK_LRC  1
#define I2S_SPK_DOUT 38

#define I2S_SD_SPK 4
#define I2S_SPKR_PORT I2S_NUM_0

#define BUTTON 12

const int sampleRate = 44100;     // Hz
const int frequency = 1000;       // Hz
const int amplitude = 1000;       // -amplitude +amplitude
const int samplesPerCycle = sampleRate / frequency;

int16_t waveBuffer[samplesPerCycle];  // store 1 cycle of triangular wave
Note, here, a 16-bit signed integer array variable (waveBuffer[ ]) is used to hold the audio sample data. The expected waveform output to the MAX98357A should look similar to below. Only the Left Channel is used.

Upon setup, you’ll see the necessary configuration parameters to set up I2S with your DAC. This includes both the I2S config and pin setup. The bits per sample are set to 16 bits using only the left channel, as expected for the DAC. Note that the configuration uses DMA, which helps preserve precious CPU cycles when streaming I2S.
					void setupI2S() {
  const i2s_config_t i2s_config = {
    .mode = (i2s_mode_t)(I2S_MODE_MASTER | I2S_MODE_TX),
    .sample_rate = sampleRate,
    .bits_per_sample = I2S_BITS_PER_SAMPLE_16BIT,
    .channel_format = I2S_CHANNEL_FMT_ONLY_LEFT,
    .communication_format = I2S_COMM_FORMAT_I2S_MSB,
    .intr_alloc_flags = ESP_INTR_FLAG_LEVEL1,
    .dma_buf_count = 8,
    .dma_buf_len = 32,
    .use_apll = false,
    .tx_desc_auto_clear = true,
    .fixed_mclk = 0
  };

  const i2s_pin_config_t pin_config = {
    .bck_io_num = I2S_SPK_BCLK,
    .ws_io_num = I2S_SPK_LRC,
    .data_out_num = I2S_SPK_DOUT,
    .data_in_num = I2S_PIN_NO_CHANGE
  };

  i2s_driver_install(I2S_SPKR_PORT, &i2s_config, 0, NULL);
  i2s_set_pin(I2S_SPKR_PORT, &pin_config);
}
A button press is detected in a loop to know when to proceed to write audio data to the I2S.
i2s_write() is issued with the necessary parameters, including those of your audio data buffer. The write will wait until the specified number of bytes are successfully written to the I2s DMA buffer. Once it’s written, the DMA will do its job of providing data to I2S irrespective of your other commands to the MCU. The write is repeated in a loop, generating a seamless audio tone, at the same time, acquiring I2S data. Correspondingly, the shutdown pin of the DAC is activated when there is no I2S write.
					uint8_t toggle = 0;

void loop() {

  size_t bytesWritten;

  if(digitalRead(BUTTON) == 0){
    delay(300);   // debounce
    toggle ^= 1;
    Serial.println("Button Pressed");

    if(toggle){
      Serial.println("Audio ON");
      digitalWrite(I2S_SD_SPK, HIGH); // turn ON speaker
    }else{
      Serial.println("Audio OFF");
      digitalWrite(I2S_SD_SPK, LOW);  // turn OFF speaker
    }
  }

  // write I2S data to DMA (1 Traingular Wave cycle)
  if(toggle){
    if(i2s_write(I2S_NUM_0, waveBuffer, sizeof(waveBuffer), &bytesWritten, portMAX_DELAY) == ESP_OK){
      Serial.print("OK"); Serial.println(bytesWritten);
    }else{
      Serial.println("Failed");
      while(1);
    }

  }

}

}
Below is a video demo of the I2S audio using a triangular wave:
Sample Code for the INMP441
Below is a sample code to simply know that your INMP411 microphone is running. Audio data is graphically output to the serial plotter in real-time.
					#include <driver/i2s.h>

#define SAMPLE_BUFFER_SIZE 512
#define SAMPLE_RATE 16000

#define I2S_BCLK_MIC 47
#define I2S_LRC_MIC 10
#define I2S_DIN_MIC 21

#define I2S_SD_SPK 4  // DAC shutdown pin

#define I2S_MIC_PORT I2S_NUM_0

i2s_config_t i2s_config = {
    .mode = (i2s_mode_t)(I2S_MODE_MASTER | I2S_MODE_RX),
    .sample_rate = SAMPLE_RATE,
    .bits_per_sample = I2S_BITS_PER_SAMPLE_16BIT,
    .channel_format = I2S_CHANNEL_FMT_ONLY_LEFT,
    .communication_format = I2S_COMM_FORMAT_I2S_MSB,
    .intr_alloc_flags = ESP_INTR_FLAG_LEVEL1,
    .dma_buf_count = 4,   // you can expereimnet with this value
    .dma_buf_len = 1024,  // you can expereimnet with this value
    .use_apll = false,
    .tx_desc_auto_clear = false,
    .fixed_mclk = 0};

i2s_pin_config_t i2s_mic_pins = {
    .bck_io_num = I2S_BCLK_MIC,
    .ws_io_num = I2S_LRC_MIC,
    .data_out_num = I2S_PIN_NO_CHANGE,
    .data_in_num = I2S_DIN_MIC};

void setup()
{

  Serial.begin(115200);

  i2s_driver_install(I2S_MIC_PORT, &i2s_config, 0, NULL);
  i2s_set_pin(I2S_MIC_PORT, &i2s_mic_pins);

  pinMode(I2S_SD_SPK, OUTPUT);
  digitalWrite(I2S_SD_SPK, LOW);  // disable the DAC

}

int16_t raw_samples[SAMPLE_BUFFER_SIZE];

void loop()
{
  // read from the I2S device
  size_t bytes_read = 0;
  if(i2s_read(I2S_MIC_PORT, raw_samples, sizeof(int16_t) * SAMPLE_BUFFER_SIZE, &bytes_read, portMAX_DELAY) == ESP_OK) {
    Serial.print("OK "); Serial.println(bytes_read);
    int samples_read = bytes_read / sizeof(int16_t);

    // dump the samples out to the serial channel.
    for (int i = 0; i < samples_read; i++)
    {
      Serial.printf("%ld\n", raw_samples[i]);
    }

  } else {
    Serial.println("Failed to read");
    while(1);
  }

}
You’ll see from the defines some parameters needed to set up I2S correctly, including the I2S MIC pinouts. A define for the DAC speaker is also included so that you can make the DAC silent when the MIC is running.
					#include <driver/i2s.h>

#define SAMPLE_BUFFER_SIZE 512
#define SAMPLE_RATE 16000

#define I2S_BCLK_MIC 47
#define I2S_LRC_MIC 10
#define I2S_DIN_MIC 21

#define I2S_SD_SPK 4  // DAC shutdown pin

#define I2S_MIC_PORT I2S_NUM_0
You configure the I2S port for the MIC through the statements below. Here, you’ll see that bits per sample is set at 16 bits and uses the left channel only. The configuration also uses DMA by using a large buffer (4 DMA buffers at 1024 in length). You set up I2S through the i2s_driver_install() and i2s_set_pin() functions. The pinMode() and digitalWrite() functions are just meant to quiet down the DAC when you are using the mic.
					i2s_config_t i2s_config = {
    .mode = (i2s_mode_t)(I2S_MODE_MASTER | I2S_MODE_RX),
    .sample_rate = SAMPLE_RATE,
    .bits_per_sample = I2S_BITS_PER_SAMPLE_16BIT,
    .channel_format = I2S_CHANNEL_FMT_ONLY_LEFT,
    .communication_format = I2S_COMM_FORMAT_I2S_MSB,
    .intr_alloc_flags = ESP_INTR_FLAG_LEVEL1,
    .dma_buf_count = 4,   // you can expereimnet with this value
    .dma_buf_len = 1024,  // you can expereimnet with this value
    .use_apll = false,
    .tx_desc_auto_clear = false,
    .fixed_mclk = 0};

i2s_pin_config_t i2s_mic_pins = {
    .bck_io_num = I2S_BCLK_MIC,
    .ws_io_num = I2S_LRC_MIC,
    .data_out_num = I2S_PIN_NO_CHANGE,
    .data_in_num = I2S_DIN_MIC};

void setup()
{

  Serial.begin(115200);

  i2s_driver_install(I2S_MIC_PORT, &i2s_config, 0, NULL);
  i2s_set_pin(I2S_MIC_PORT, &i2s_mic_pins);

  pinMode(I2S_SD_SPK, OUTPUT);
  digitalWrite(I2S_SD_SPK, LOW);  // disable the DAC

}
Inside the main loop, you’ll see that the audio data raw samples are set at a 16-bit integer type. I2S data is extracted from the microphone through i2s_read() with the necessary data handling parameters. The samples are read in 16-bit format, although the INMP441 really outputs 24-bit per channel (so some fidelity is lost). The INMP441 waveform for the left channel can be seen below. Note that you need to GND the L/R channel port to signal to the MIC that you are intending to use the Left channel.

See the output waveform below. To get an orderly visual, try to whistle into the mic to get a constant frequency waveform. The more you increase the sampling rate, the finer your graph will be.
You’ve just learned intermediate ESP32 I2S audio fundamentals. In the next part, you’ll be able to integrate the mic and the audio amp to do an ESP32 voice recording.
SHOP THIS PROJECT
-
Sale!

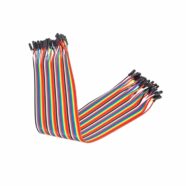
40cm Dupont Jumper Wire Cable 40 pcs – Female to Female
$15.95Original price was: $15.95.$14.95Current price is: $14.95. Add to cart