Introduction
This tutorial details the DS18B20 Waterproof Digital Temperature Sensor, its functions and the process to build a project using the DS18B20 Waterproof Digital Temperature Sensor and an Arduino.
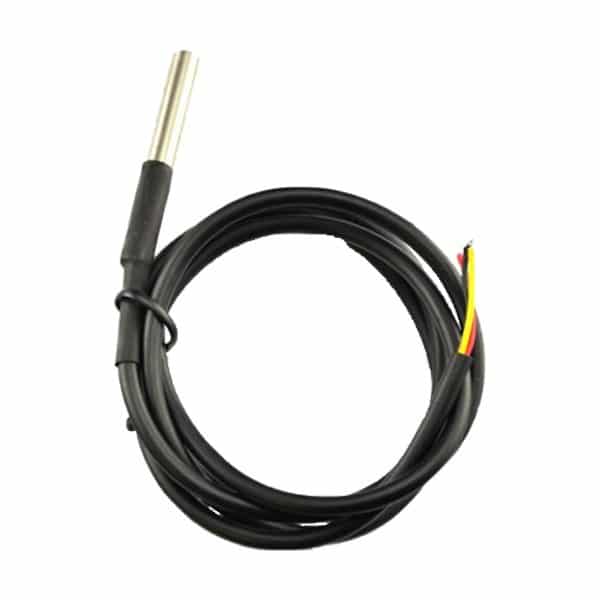
DS18B20 Waterproof Digital Temperature Sensor Probe
The DS18B20 Waterproof Digital Temperature Sensor Probe allows for the temperature to be measured from a distance or underwater. The 1-Wire temperature sensor design makes it easy and quick to set up and can be used with multiple DS18B20 Sensors. In addition, the tinned wires of the probe provide flexibility and better oxidation resistance and a soft feel.
Pin Out
| Wire Colour | Description |
|---|---|
| Black | Ground |
| Red | Power supply of the module (5VDC) |
| Yellow | Data Output |
How it Works
The DS18B20 Probe is a waterproof digital temperature sensor that can measure temperature from -55°C to + 125°C with an accuracy of 0.5°C. The probe has a simple set-up with only a single wire communication protocol with a microcontroller.
Project - Arduino Ambient Temperature Monitor
This project will show how the DS18B20 Waterproof Digital Temperature Sensor can be used to monitor ambient temperature and be displayed in the serial monitor.
Components
- Arduino Uno Board (1 pc.)
- DS18B20 Waterproof Digital Temperature Sensor Probe (1 pc.)
- 4.7K Ohms Resistor (1pc.)
- Jumper Wires
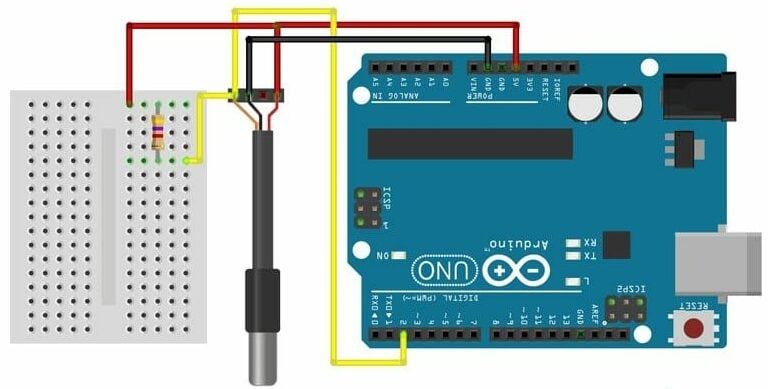
Wiring Diagram
The DS18B20 module pins are connected to the Arduino Uno board as follows:
| Wire Colour | UNO Board Pin |
|---|---|
| Black | GND |
| Red | 5V |
| Yellow | 2 |
4.7K Ohms Pull-up resistor is added to the data wire (yellow) for accurate temperature reading.
Code
Download both libraries required for this project first before proceeding. The libraries are available here;
Arduino Temperature Control Library
OneWire Master Library
Once the libraries are installed, the program code can be uploaded.
					// Include the libraries we need
#include <OneWire.h>
#include <DallasTemperature.h>
// Data wire is plugged into port 2 on the Arduino
#define ONE_WIRE_BUS 2
// Setup a oneWire instance to communicate with any OneWire devices (not just Maxim/Dallas temperature ICs)
OneWire oneWire(ONE_WIRE_BUS);
// Pass our oneWire reference to Dallas Temperature.
DallasTemperature sensors(&oneWire);
/*
 * The setup function. We only start the sensors here
 */
void setup(void)
{
  // start serial port
  Serial.begin(9600);
  Serial.println("Dallas Temperature IC Control Library Demo");
  // Start up the library
  sensors.begin();
}
/*
 * Main function, get and show the temperature
 */
void loop(void)
{
  // call sensors.requestTemperatures() to issue a global temperature
  // request to all devices on the bus
  Serial.print("Requesting temperatures...");
  sensors.requestTemperatures(); // Send the command to get temperatures
  Serial.println("DONE");
  // After we got the temperatures, we can print them here.
  // We use the function ByIndex, and as an example get the temperature from the first sensor only.
  float tempC = sensors.getTempCByIndex(0);
  // Check if reading was successful
  if(tempC != DEVICE_DISCONNECTED_C)
  {
    Serial.print("Temperature for the device 1 (index 0) is: ");
    Serial.println(tempC);
  }
  else
  {
    Serial.println("Error: Could not read temperature data");
  }
}
Project Test
Once the components are wired as per the wiring diagram, connect the Arduino to the PC and upload the program. Open the Serial Monitor in the Arduino IDE and the ambient temperature detected by the sensor will be displayed.


