Have you tried running CircuitPython on your boards? You’ll be amazed at how easy it is to use. Get started using CircuitPython on your microcontroller-based projects today.
Introduction
CircuitPython is an interpreter-based programming language made for the Adafruit brand learning system. Interpreter-based meaning there is no need for any compilation to happen when you’re programming your boards. With this, the statements in your code are translated in real time as they are read.
CircuitPython is based on MicroPython; another derivative of the popular Python programming language. Although MicroPython has more advanced features compared to CircuitPython, the vast amount of libraries and supported hardware of CircuitPython outweigh what MicroPython has. Adafruit made CircuitPython for beginners so that people who use them can learn to code microcontroller-based projects faster.
With this, here are the steps to get you up and running using CircuitPython.
Get Your CircuitPython Capable Board or Microcontroller
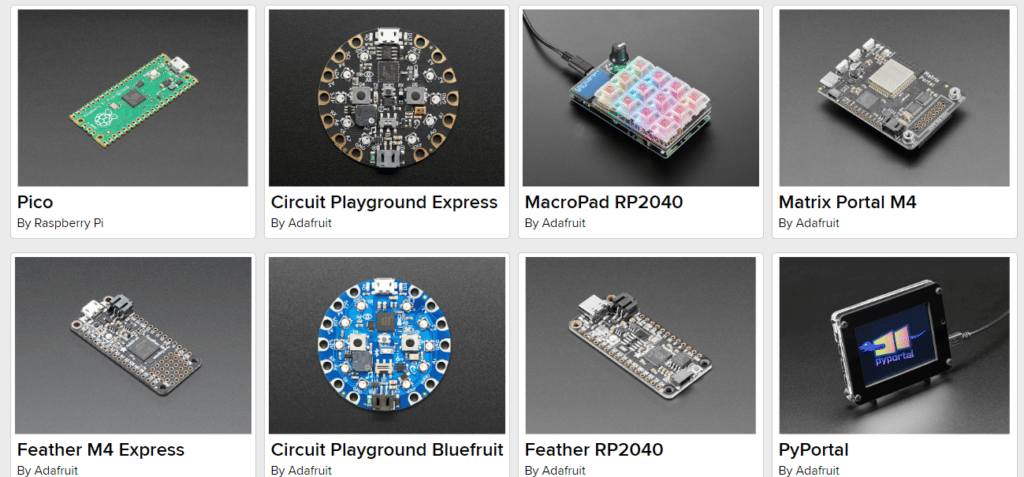
There are several CircuitPython-capable boards. Most of these boards come from Adafruit. However, there are a growing number of boards coming from other brands that support CircuitPython as well. There is Raspberry Pi, Seed Studio, Esspressif, Pimoroni, and Cytron Technologies, to name a few. You could also create your own custom board as long as the microcontroller (or microprocessor) it uses is supported by CircuitPython.
Download and Install the MU Python IDE
The Mu Python IDE is the preferred working environment for CircuitPython. Download it on Mu’s website then install it on your PC. Mac and Linux versions of the software are also available.
The previous blog post discussed writing your first program for the RPI Pico using Micropython. Here we’ll do something similar, only using CircuitPython instead.
Download The CircuitPython Interpreter For Your Board
If Arduino compiles a user program to be saved and run on your bare boards, CircuitPython does it differently. CircuitPython, as in all Python derivatives, installs the interpreter on your board instead. The interpreter is “alive” and can interpret user code in real time. It can also act as REPL, meaning a Read-Eval-Print Loop that returns results immediately via the user prompt.
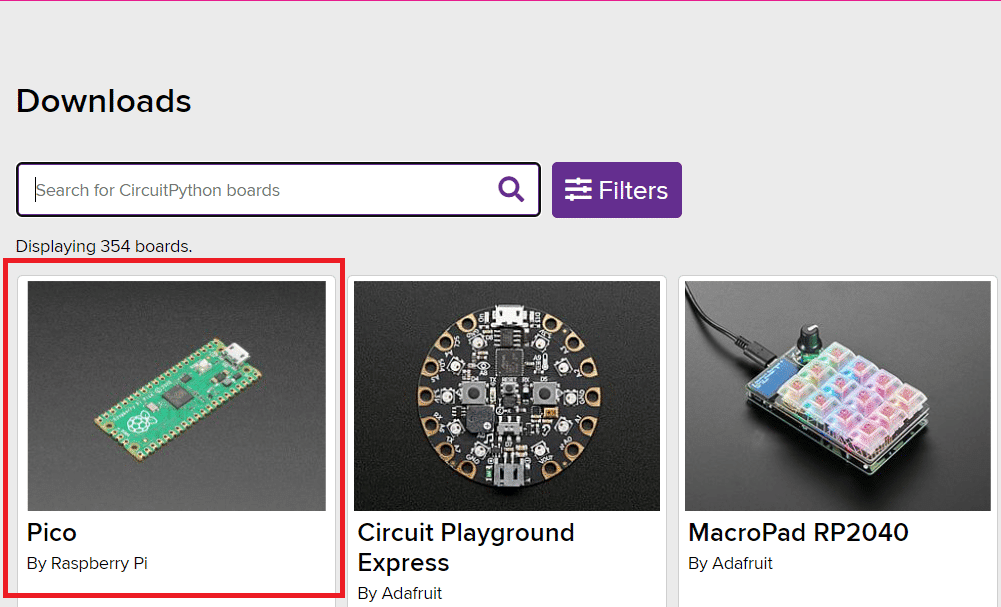
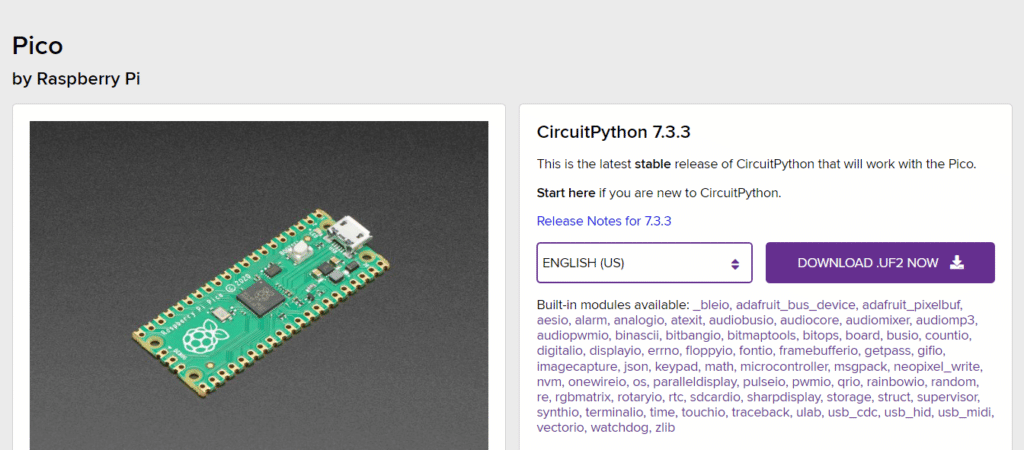
Go to the CircuitPython website to download the specific CircuitPython version of your board. Here, as an example, the CircuitPython version for an RPI Pico is used.
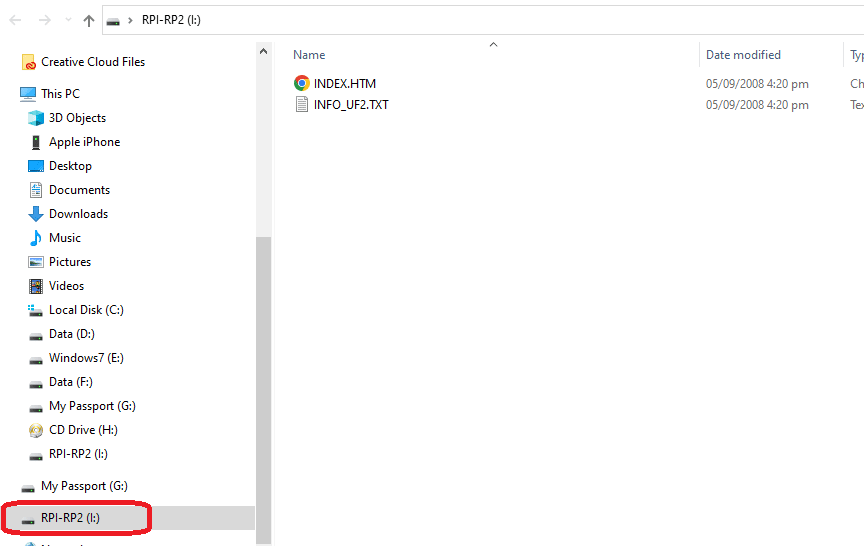
You’ll need to download the UF2 file for the CircuitPython version of your choice to your computer. After that, transfer this file to your microcontroller board. This can be done by turning the RPI Pico into a USB drive first. The RPI Pico is in bootloader mode at this state. To go to this state, press the Boot button first before powering up the Pico through the USB cable. After this, the Pico should now appear as a disk drive on your PC. When this happens, simply drag and drop the unzipped CircuitPython UF2 file into this drive.
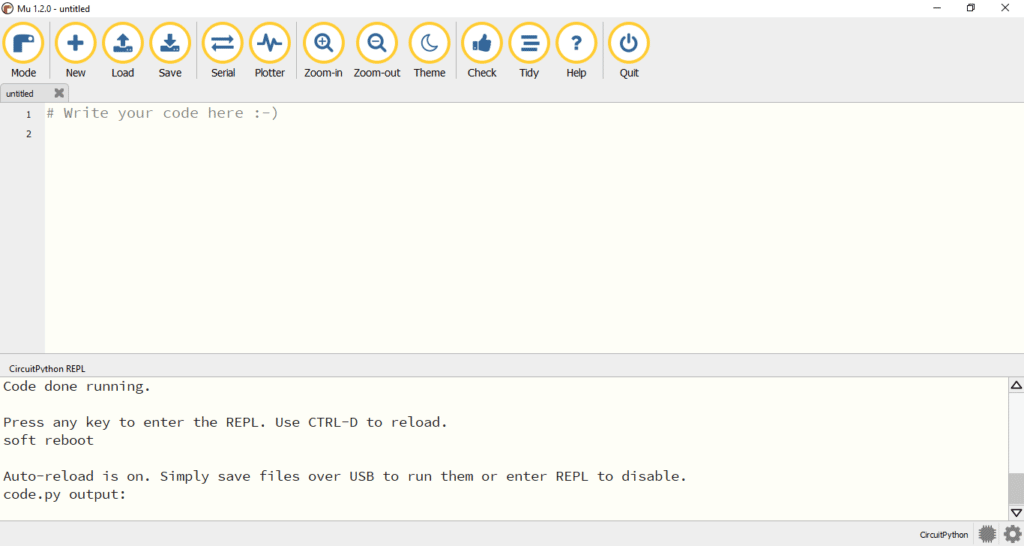
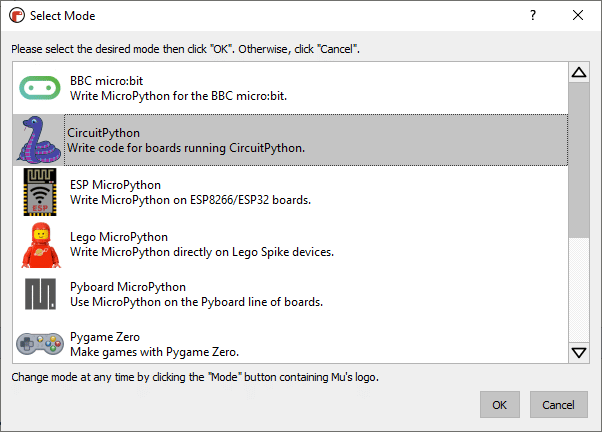
Setup MU Python IDE Correctly
Initially, Mu will ask you what kind of interpreter to use. Choose CircuitPython. You can do this again by pressing the Mode button on the upper right of the Mu IDE and then selecting CircuitPython as your interpreter.
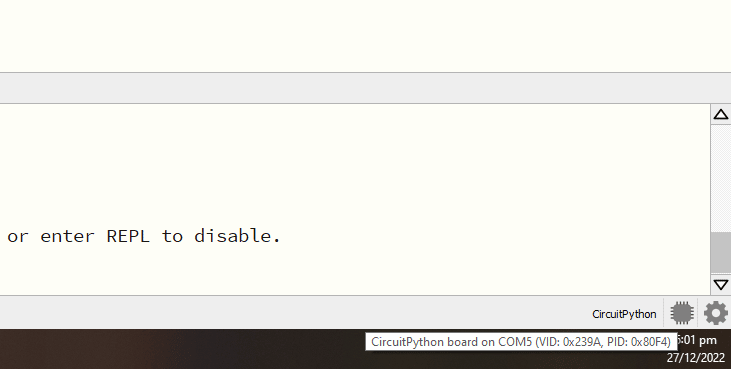
Mu will usually detect your board with the CircuitPython interpreter automatically. The board should automatically reset after you transferred the UF2 file previously in bootloader mode.
Test Your CircuitPython Setup
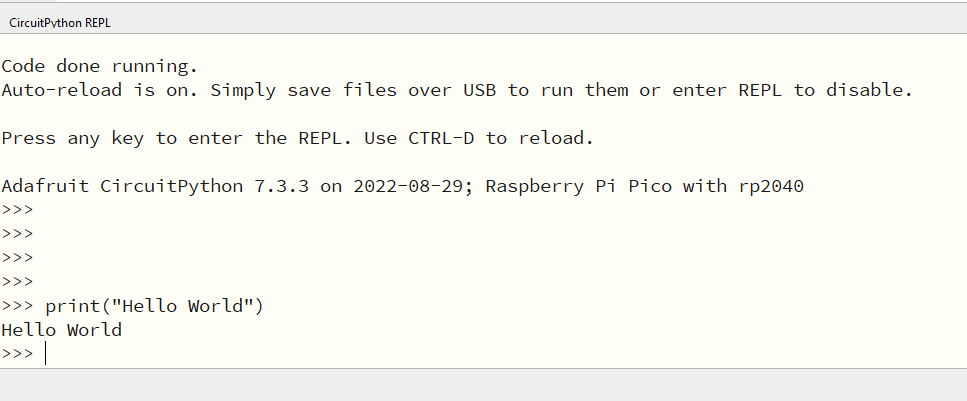
The easiest way to test your CircuitPython setup is to print out something on REPL. REPL mode can be invoked by clicking the Serial icon above and then pressing any key. Alternatively, if you want to run your code instead of REPL type in CTRL-D.
Go ahead and type in print(“Hello World”) at the REPL prompt and you should see it being echoed at the prompt.
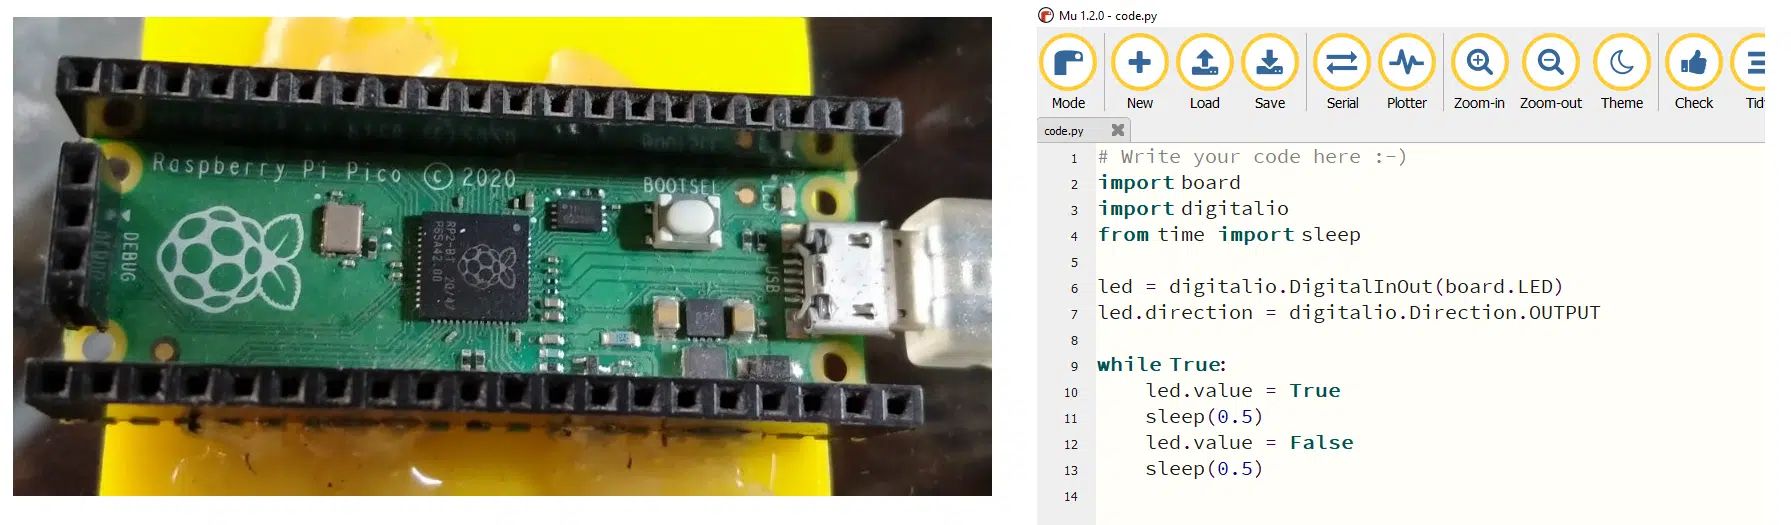
Making LED Blink Project in Circuit Python
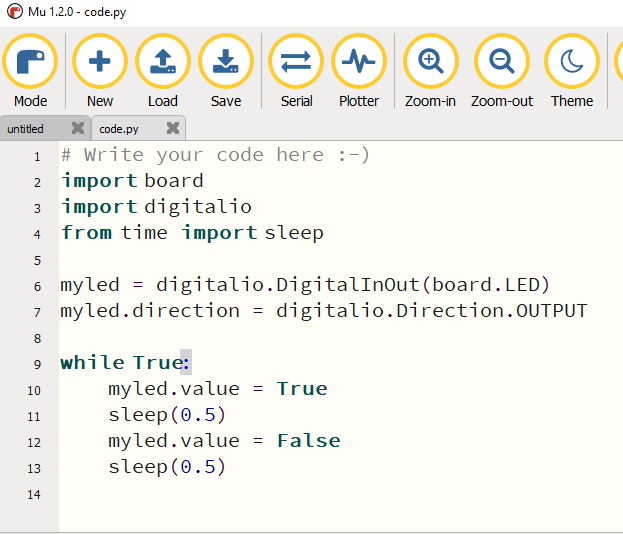
Making an LED blink is a good place to start coding. Go to the text editor and type the statements below:
					import board

import digitalio

from time import sleep

myled = digitalio.DigitalInOut(board.LED)

myled.direction = digitalio.Direction.OUTPUT

while True:

    myled.value = True

    sleep(0.5)

    myled.value = False

    sleep(0.5)
With this code, you should be able to see your RPI Pico’s LED blink at 0.5-second intervals. If you want to go back to REPL, interrupt the code being run by pressing CTRL+C and then press any key.
Regarding the first three statements, the import statement imports libraries needed for your code to work. The board library is needed for your specific board or hardware to work properly. The same is true for digitalio which is needed for your board’s digital input and output. Lastly, importing the sleep module from the time library can make you generate delays in your code.
The next two statements assign the LED pin to the object myled and set it to become a digital output pin.
These libraries are called built-in libraries. It’s already included in the CircuitPython installation. To see more built-in libraries type in:
help(“modules”)
Alternatively, there are CircuitPython libraries that are not built-in. These libraries come from Adafruit or are community-driven libraries. These libraries make CircuitPython versatile like their Arduino counterpart. CircuitPython libraries will be discussed in another article.
On with the code. The led blinking happens inside the while loop. The myled object is given a value (True – ON, False – OFF) through the myled.value statement. The sleep() function provides the necessary delay to make the blinking happen. You can change the parameter value in the sleep function to your liking.