This tutorial will help you get started with ESP-IDF (Espressif IoT Development Framework) using the command line version in Windows.
Introduction
Espressif has gotten a long way with their wireless systems and ESP32 devices. Among their SDKs (Software Development Kits) their ESP-IDF stands out. ESP-IDF stands for Espressif IoT Development Framework. This tutorial will help you install the Windows comand-line version of this framework on your PC and make you understand how to use it. You can also integrate this SDK with Visual Studio Code as what was done on this previous blog.
Download and Install ESP-32 IDF
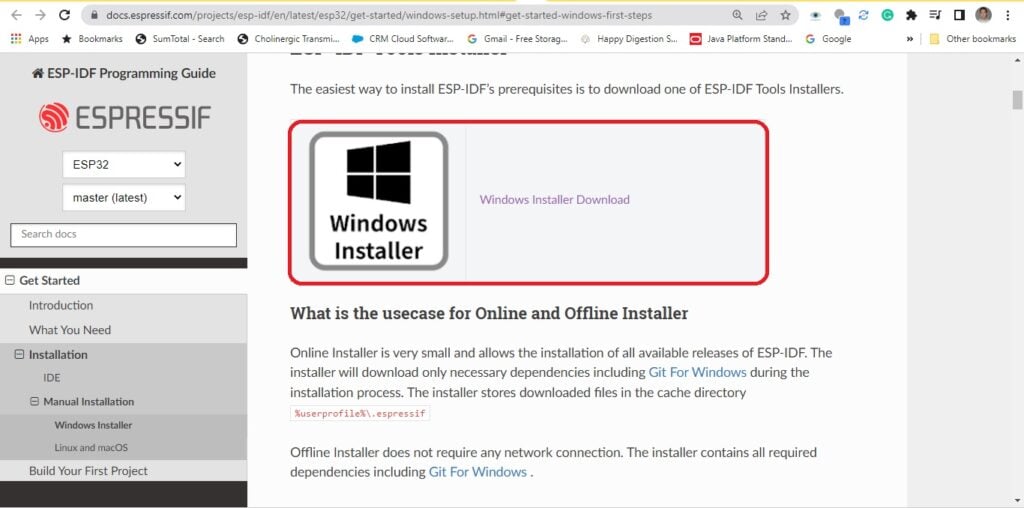
You can readily download ESP-32 IDF (Windows installer version) on the ESP32-IDF Getting Started Page. This page is an extensive guide on how to install the Windows version of ESP-32 IDF. Click on the Windows Installer and then download the
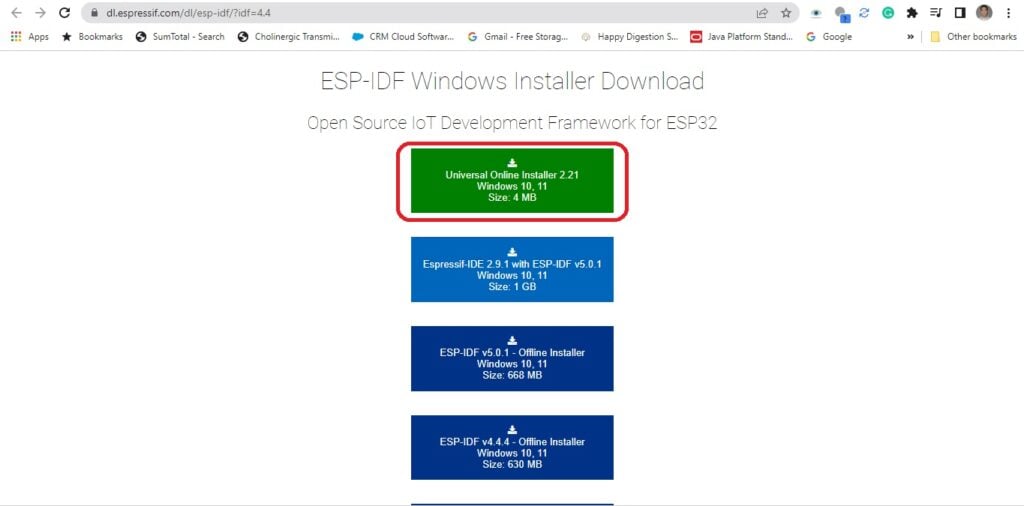
Follow the on-screen installation instructions until you reach the ESP-IDF command prompt. Make sure you select that prompt from the Completeing the ESP-IDF Tools Setup Wizard.

You can also run the command prompt from the Windows Start button through the ESP-IDF program folder.
Running Commands from the ESP-IDF Command Prompt
The ESP-IDF command prompt is loaded with all the necessary paths and applications to program your ESP device. This includes a Python interpreter, bulid tools, tool chains, APIs, and sample applications. All this can be run through a simple command-line.
Alternatively, you can also use Eclipse or VSCode to run ESP-IDF as a plug-in or extension, respectively. This other tutorial will help you install ESP-IDF as an extension to VSCode from scratch. However, there is another way to install the ESP-IDF extension if you’ve already installed the Windows command line version.
You’ll usually need to get inside a program directory to be able to perform your desired operation. Example operations are setting a target, performing a configuration, building and flashing a program, and monitoring program execution.
Usual Steps to Run a Program through the ESP-IDF Command Shell
Set a target chip to build your program upon such as the ESP32. Type in:
idf.py set-target esp32
You can perform a configuration on a program to customize some parameters (such as ports to use, speed and clock settings, etc). A handy GUI pops-up to make it easy for you to set things up. Type-in:
idf.py menuconfig
If you are ready to build or compile the program, simply type:
idf.py build
To be able to flash the generated machine code (.bin or .elf) to your device, type in:
idf.py -p <PORT> flash
The PORT is the port where your ESP32 is connected. You can check Device Settings in Windows to see that port.
To see debug messages while running your code, simply type:
idf.py -p <PORT> monitor
A handy shortcut to use to build, flash and monitor your program unto your ESP32 device consecutively is:
idf.py -p <PORT> build flash monitor
Video Demonstration of Running an Example Code in ESP-IDF
This starts at the default directory of the ESP-IDF command shell. A copy of the example code is copied to the user/esp directory. This is to ensure that the original example code is preserved.
Note that the in this demo, the build time has been reduced because the program has been pre-built already.


