Would you like to create your own custom ESP-IDF component in your VS Code project? Find the process here.
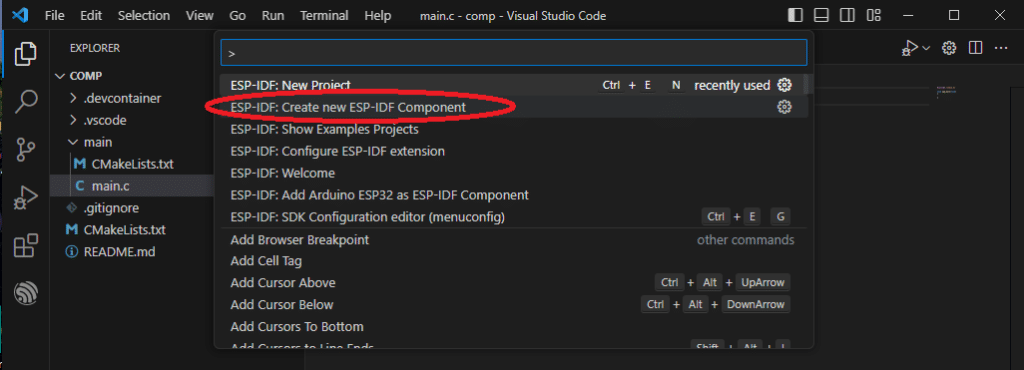
Search for Create New ESP-IDF Component in the Command Pallete
You can create components for your devices or custom functions in ESP-IDF. After creating or if you’re working on your ESP-IDF project, see the example below on the process to do it:
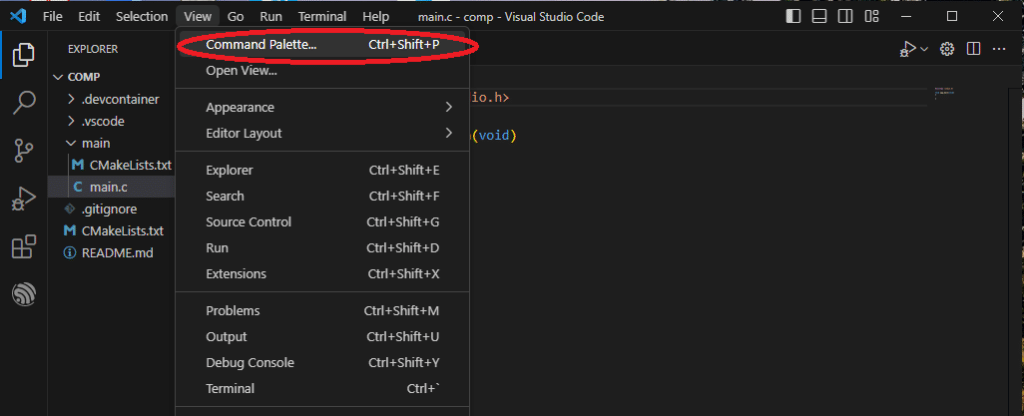
From View -> Command Pallete, search for ESP-IDF create New Component
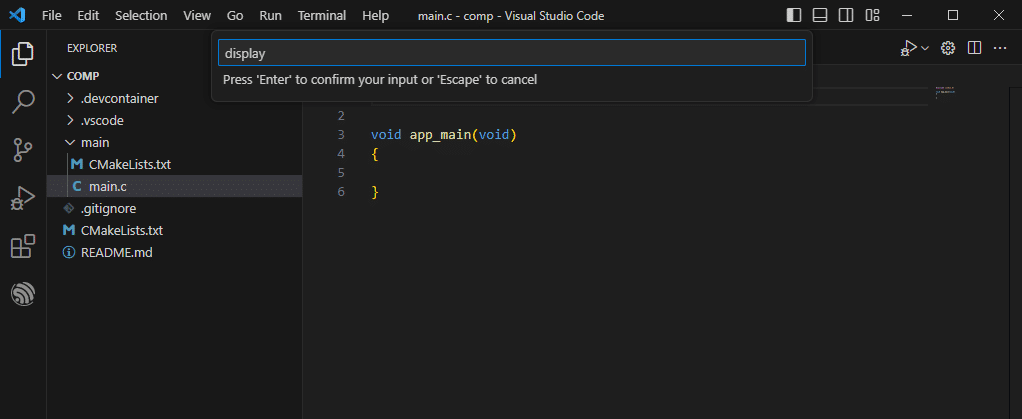
Name Your Component
Then name your component appropriately. Here, ‘display‘ will be the name of this component.
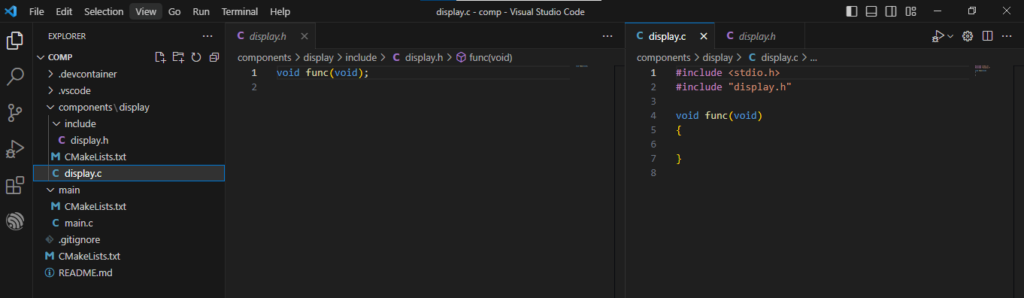
After this, you’ll immediately see display.h and display.c files generated with a minimal function set.
Edit or Create your Custom Functions
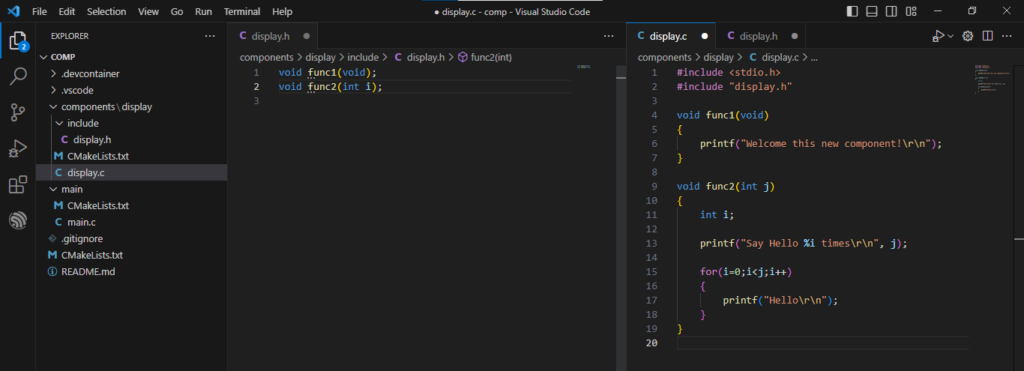
You can now edit or create your custom functions. Here, two functions func1(void) and func2(int i) are made just to display text on your screen.
Here is display.c
					#include <stdio.h>
#include "display.h"

void func1(void)
{
    printf("Welcome this new component!\r\n");
}

void func2(int j)
{
    int i;

    printf("Say Hello %i times\r\n", j);

    for(i=0;i<j;i++)
    {
        printf("Hello\r\n");
    }
}
While this is for display.h
					void func1(void);
void func2(int i);
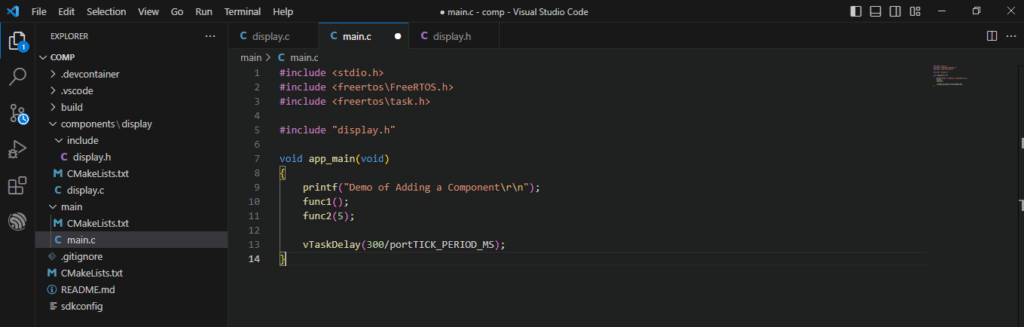
Edit your main.c file
Next, you can continue to edit your main to access your component functions. Simply add the component header file display.h in your include list. Next, call or access your previously created functions in main.
This is main.c should look like:
					#include <stdio.h>
#include <freertos\FreeRTOS.h>
#include <freertos\task.h>

#include "display.h"

void app_main(void)
{
    printf("Demo of Adding a Component\r\n");
    func1();
    func2(5);

    vTaskDelay(300/portTICK_PERIOD_MS);
}
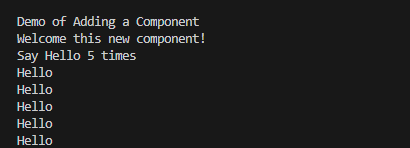
Build and Run your Code
After building and running your code, the output of the monitor should look like: