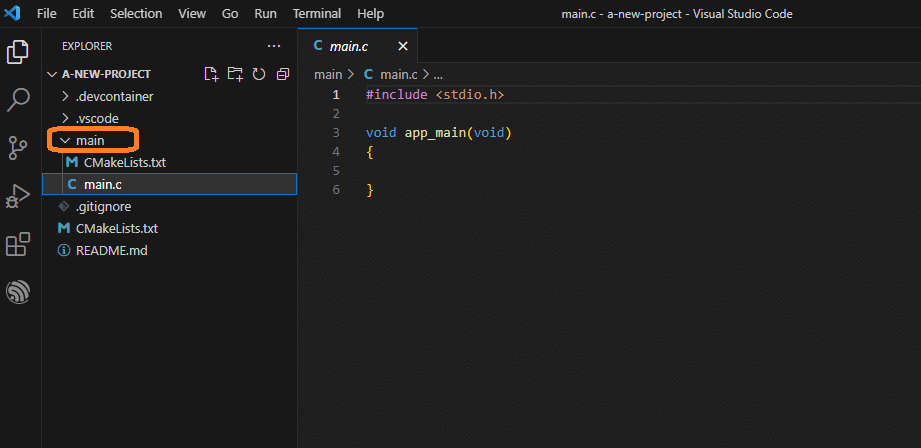
Phipps Electronics

Order within the next 

FREE SHIPPING OVER $199

50,000+ ORDERS

WORLDWIDE SHIPPING

SSL SECURED

How to Create a New Project in ESP-IDF Using Visual Studio Code

Contents

Don’t know how to create a new project in ESP-IDF using visual studio code? Want to know the specific steps? Read the article below to start creating code for your ESP32 projects.

Introduction

Previously, you’ve learned how to install ESP-IDF in Windows and through the Visual Studio Code plug-in. By this time, you may have found the pros and cons programming for each environment.

Using the command-line version of ESP-IDF can be quite challenging. You may have to review several Powershell or Command Shell Prompt commands to get things done. Besides, it’s hard not to have a handy GUI to help you during your programming sessions.  Having an IDE can definitely make things a lot easier. 

The ESP-IDF CMD Shell

ESP-IDF on Visual Studio Code, How to Start a New Project?

After going through several example codes using ESP-IDF in VS Code, how do you create your first project? You may already have your hair pulled several times after trying to look for the “Start a New ESP-IDF Project” on the Visual Studio Code command menu but ended up in vain.

The Command Pallete will help you with this. Simply go to View -> Command Pallete. If you have ESP-IDF installed, you should see “ESP-IDF: New Project” without searching too much. Click on this.

After this, a New Project window dialogue appears. You can input several details here, such as the Project Name, Project directory, and the Serial Port to use. The Choose ESP-IDF Board drop-down shows you several options for programming Espressif Boards.  You can select your ESP32 chip (via ESP-PROG) if you have a board with an FDTI chip. Choose other ESP-IDF Boards and programming methods if you need to.

If you want to program something that’s not on the list (such as custom boards), you can choose Custom Board and then select the ESP-IDF Target chip and programming method you want.

Now that you’ve finished inputting your project details, click Choose Template to start with a pre-defined project template that works with ESP-IDF out of the box. This template prevents you from worrying about your project’s default include directories and other configuration or programming options. 

The set of templates are the one’s below. Here we’ll concentrate on the template-app.

This new template already creates the necessary Make files to successfully build your project. The template likewise sets up the proper include source file directories for an ESP-IDF program to run (such as driver/gpio.h, freeRTOSH/freeRTOS.h, and the like). Click Create project using template template-app to proceed.

You’ll notice the Create project using template template-app button change it’s font color from white to black. This means your new project has been created.  

You now need to open the folder where your new project with the template app was created to make it active on the VS Code Explorer pane. Click File -> Open Folder

Then click Select Folder.

Your new project will appear on the Explorer pane on the left. Expand the main folder and click the main.c file to see its contents.

You can now start writing your code. As an example, here is a simple blinky code. You can immediately include the necessary ESP-IDF component header files you need without worrying about them not being recognized during the compilation process. Here, the components header files to include are driver/gpio.h, freeRTOS/freeRTOS.h, and freeRTOS/task.h  

				
					#include <stdio.h>

#include "driver\gpio.h"
#include "freeRTOS\freeRTOS.h"
#include "freeRTOS\task.h"

#define BUILTIN_LED GPIO_NUM_2


void app_main(void)
{
 
    gpio_set_direction(BUILTIN_LED, GPIO_MODE_DEF_OUTPUT);
 
    while(1)
    {
        gpio_set_level(BUILTIN_LED, 1);
        vTaskDelay(100);
        gpio_set_level(BUILTIN_LED, 0);
        vTaskDelay(100);
    }

}


SUBSCRIBE FOR NEW POST ALERTS

Subscribe to be the first to know when we publish a new article!
List Subscriptions(Required)

POPULAR POSTS

Scroll to Top