Reading sensors and displaying their output is one of the basic things you can do with an Arduino. Here you’ll learn how to read both temperature and humidity using the DHT11 sensor and then display these values on an OLED screen.
Introduction
Suppose you’d want to understand the effects of weather changes on the performance of your equipment. You can use your mobile phone or computer to display the temperature and humidity that were picked up from an online resource for your data collection. However, it would be cumbersome to reach out to these gadgets every now and then just to look at this data. Additionally, you won’t be getting correct values from a specific location using these tools.
You can customize a temperature and humidity gadget just for this purpose. This article will demonstrate how to do this by adequately acquiring data from a DHT11 sensor, and then displaying it on an OLED screen. Once you learn these things, you’ll be able to correctly analyze the effects of weather changes on certain situations at specific locations.
Things you Will Need:
1 x DHT11 sensor
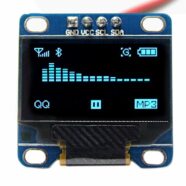
1 x OLED display (128×64) 0.96 inches
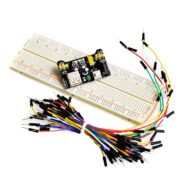
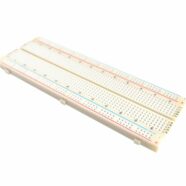
1 x Breadboard
1 x pack Connecting wires
2 x 4.7k Resistor
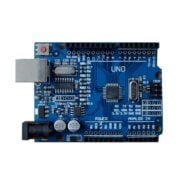
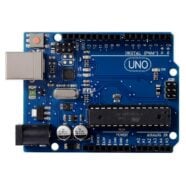
1 x Arduino UNO
DHT11 Sensor
The DHT11 sensor is both a temperature and humidity sensor that can output its gathered data serially through its 1-wire interface. It’s a very low-cost sensor that takes time to have a valid output (about 1 or 2 seconds), just enough for data-logging applications.
The previous blog, Using the Temperature and Humidity Sensor KY-015 with Arduino, explains the sensor further. It shows its pinouts (using the KY-015 module) and how this sensor gathers data through code. The code further explains how the 1-wire serial interface works without using the Arduino DHT11 library (ala bit-bang approach).
Here is what the stand-alone DHT11 sensor looks like. Beside it are its pinouts.
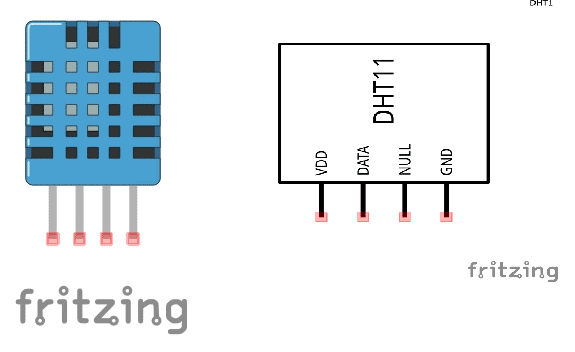
| Pins | Description |
|---|---|
| 1 – VDD | Works from 3.3 – 5.5V DC |
| 2 – DATA | Unidirectional serial I/O line |
| 3 – NULL | No-connect |
| 4 – GND | Ground |
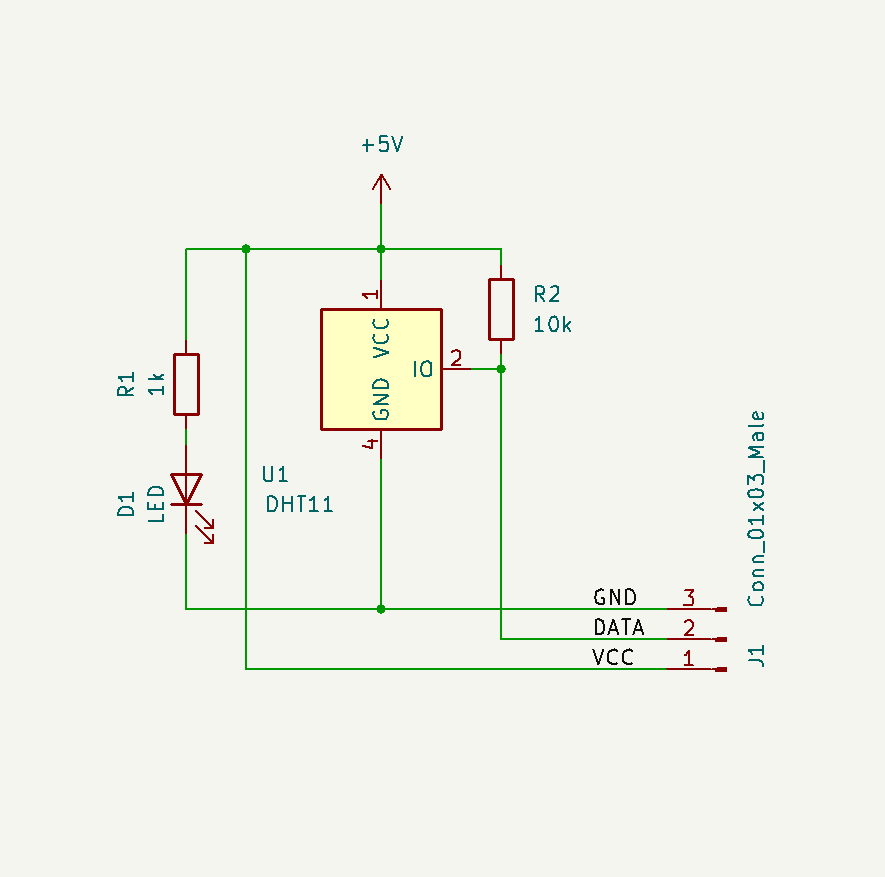
If you want to wire them up similar to the modules, see the example schematic diagram below:
Note that the DHT11 has a close cousin called the DHT22. The DHT22 has a slightly better specification than the DHT11, although it has a higher price. Here is a list of specifications for their differences:
DHT11
- Supply Voltage: 3.5 to 5.5V
- Output Signal: digital signal via single-bus
- Operating Range and Accuracy (Humidity): 20-80% RH; +/-5% RH
- Operating Range and Accuracy (Temperature): 0 to 50 C; +/-2% C
- Average Sending Period: 2 seconds
- Dimensions (excluding pins): 12.6mm (0.5″) length x 5.83mm (0.23″) width x 16mm (0.63″) height
- Weight: 2.4g
DHT22
- UAccuracy Resolution: 0.1
- Humidity Range: 0 – 100% RH
- Temperature Range: -40 ~ 80 Degrees
- Humidity Measurement Precision: ± 2% RH
- Temperature Measurement Precision: ± 0.5 Degrees
- 3V to 5V Power and I/O
- 2.5mA Max Current use During Conversion
- Body Size 15.1mm x 25mm x 7.7mm
- 4 Pins with 0.1″ Spacing
Both the DHT11 and DHT22 are available through Phipp’s Electronics. You can also purchase a DHT11 module separately. It can also be part of the 37-in-1 Sensor Module Kit.
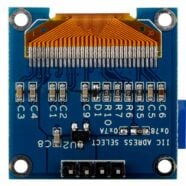
OLED Screen
An OLED stands for “Organic LED”. One of its elements is an organic compound for displaying light. With this, you can write text or graphics in pixel form and display them on your screen.
The OLED in use in this tutorial uses the SSD1306 driver IC. It’s a dedicated chip for displaying and driving the OLED’s monochromatic output through a programmable interface. The interface of the OLED in this tutorial uses I2C while its pixel characteristic is 128×64. It also has a display dimension of 0.96 inches.
You can buy the OLED here.
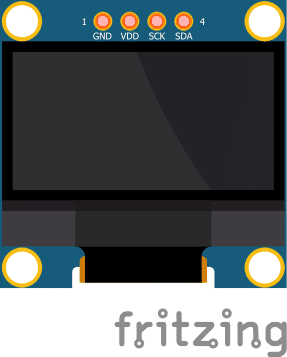
Here is the OLED’s pin layout.
| Pin | Description |
|---|---|
| GND | Ground |
| VDD | Supply voltage, 3.3 – 5.0V |
| SCL/SCK | I2C serial clock line |
| SDA | I2C serial data line |
Putting it all Together
Wire up the parts as below in a breadboard:
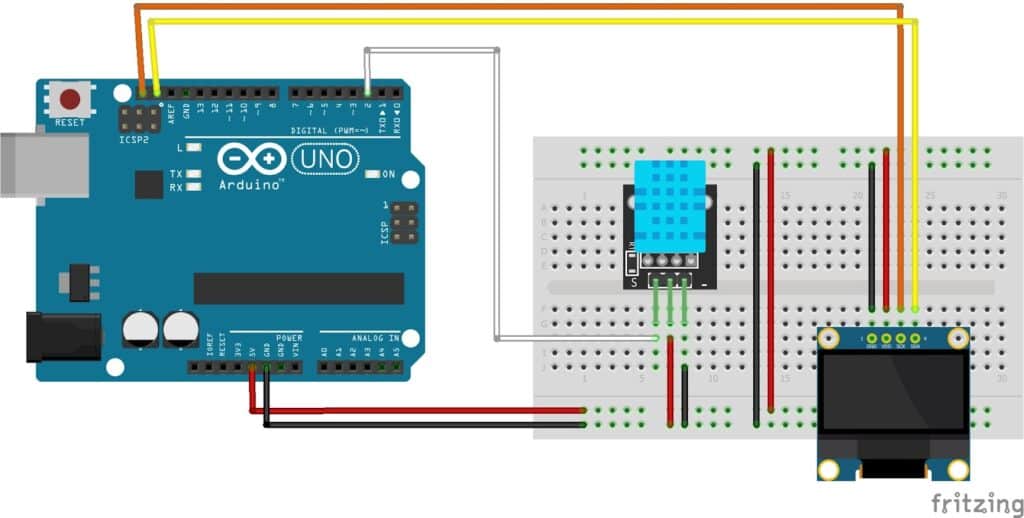
As you can see, the Arduino UNO is connected to both the temp/humidity sensor and the OLED screen.
The OLED’s I2C SDA and SCL lines connect to the UNO’s own SDA and SCL lines (which also connect to the A4 and A5 pins). You won’t external need pull-ups as the UNO enables them internally through the library.
The DHT11 used here is contained in the KY-015 Temp and Humidity module. However you can wire up the sensor yourself, but you should include an external pull-up resistor on the output line.
Once finished, you can continue writing firmware on the Arduino IDE.
Creating FIrmware
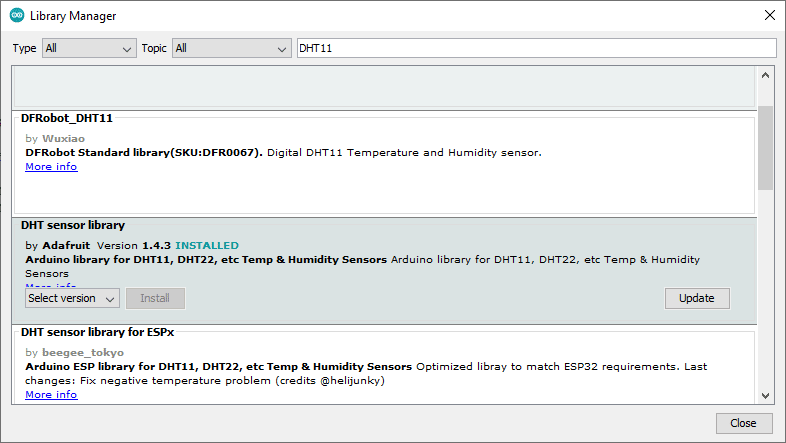
When you get a new sensor, you should download and include a library. Go to the Library Manager by going to Tools -> Manage Libraries… Search for DHT11 and install the DHT sensor library.
Next, download and install the Adafruit SSD1306 library
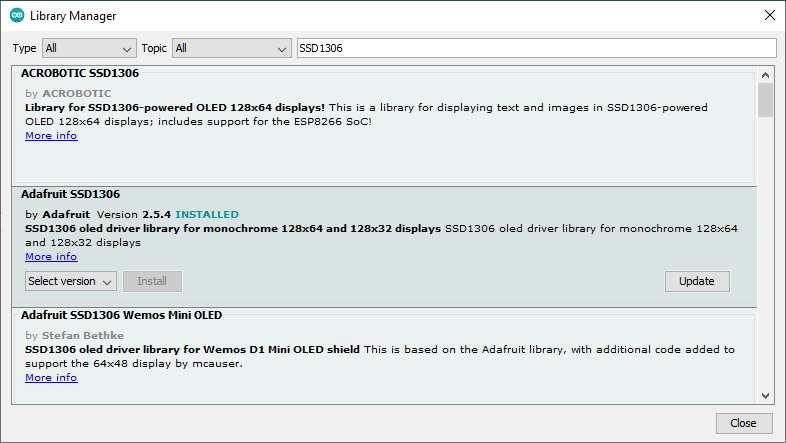
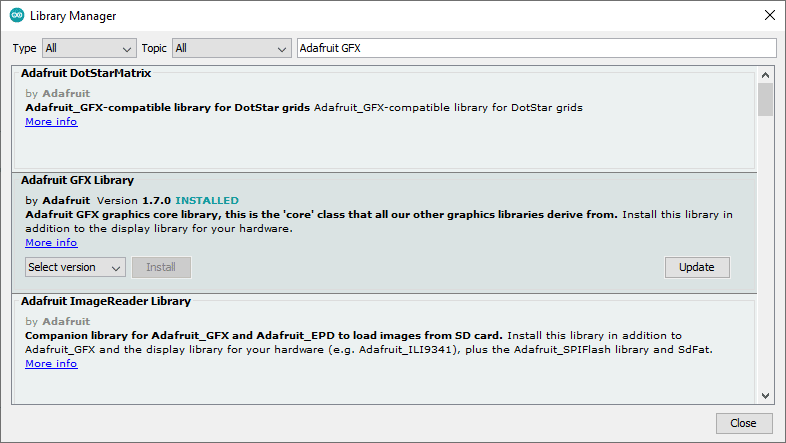
You should also be getting the Adafruit GFX library automatically upon installing the SSD1306.
After installing the libraries, you can now include them in your new sketch by going to Sketch -> Include Library. You should see the DHT Sensor Library and the Adafruit SSD1306 library.

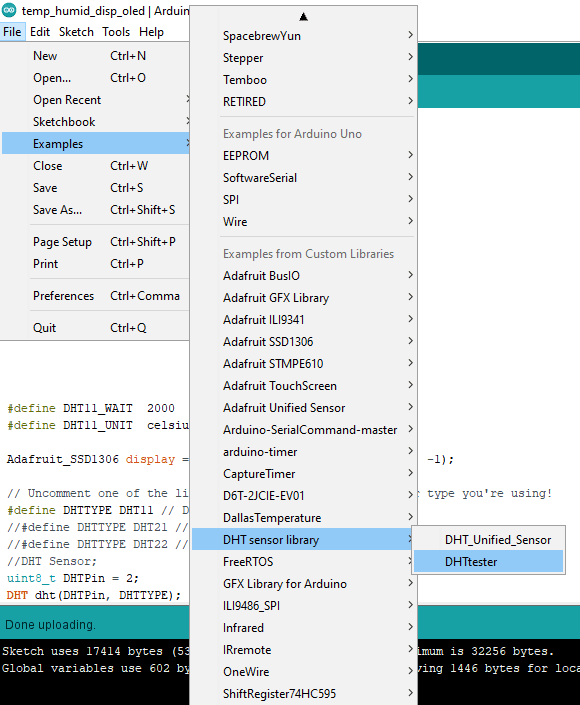
Before going further, you may want to take a look at the example sketches for the DHT11 sensor and SSD1306 display module.
Go to File -> Examples -> DHT11 sensor library – > DHTester
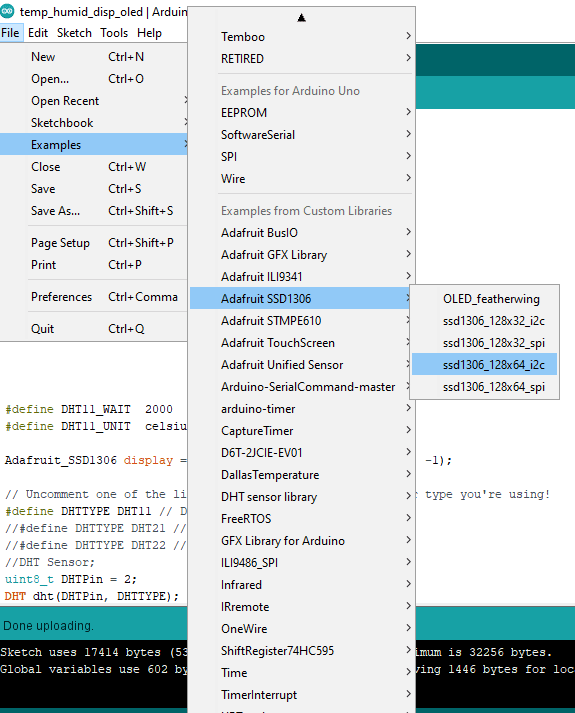
For the SSD1306, find the Adafruit SSD1306 example through the SSD1306_128x64_i2c sketch.
The demo code we’ll make is based on these example codes.
Download the entire demo code here for reference.
Here is the part of the includes, defines, variables, and object declarations for the demo code:
					#include <Adafruit_SSD1306.h>
#include <splash.h>

#include <DHT.h>
#include <DHT_U.h>

#define DHT11_WAIT 2000 // 2 secs delay for every sensor pickup

#define celsius     0
#define fahrenheit  1

#define DHT11_UNIT  celsius
//#define DHT11_UNIT  fahrenheit

Adafruit_SSD1306 display = Adafruit_SSD1306(128, 64, &Wire, -1);

// Uncomment one of the lines below for whatever DHT sensor type you're using!
#define DHTTYPE DHT11 // DHT 11
//#define DHTTYPE DHT21 // DHT 21 (AM2301)
//#define DHTTYPE DHT22 // DHT 22 (AM2302), AM2321
//DHT Sensor;
uint8_t DHTPin = 2;
DHT dht(DHTPin, DHTTYPE);

float Temp;
float Humidity;
float Temp_F;
Note the definition for DHT11_WAIT was set to 2 seconds. There are also definitions for celsius and fahrenheit conversions. Set your DHTTYPE and Adafruit_SSD1306 and DHT instances appropriately as in the example codes.
The setup code is seen below:
					void setup() {
  Serial.begin(115200);
  Serial.println("start");
  pinMode(DHTPin, INPUT);
  dht.begin();
  // by default, we'll generate the high voltage from the 3.3v line internally! (neat!)
  display.begin(SSD1306_SWITCHCAPVCC, 0x3C);  // initialize with the I2C addr 0x3C (for the 128x64)
   // init done
  display.display();
  delay(100);
  display.clearDisplay();
  display.display();
  display.setTextSize(1);
  display.setTextColor(WHITE);

}
The initialization for the DHT sensor is made with the dht.begin( ) statement, while for the SSD1306 it’s display.begin(SSD1306_SWITCHCAPVCC, 0x3C). The I2C address that was used here is 0x3C, but this may be different than yours.
The loop( ) code executes statements as in the example codes. Here Celsius and Fahrenheit’s readings are displayed accordingly using an if-then-else statement.
					void loop() {

  delay(DHT11_WAIT);

  // read sensor
  Humidity = dht.readHumidity();
  // Read temperature as Celsius (the default)
  Temp = dht.readTemperature();
  // Read temperature as Fahrenheit (isFahrenheit = true)
  Temp_F= dht.readTemperature(true);

  // Check if any reads failed and exit early (to try again).
  if (isnan(Humidity) || isnan(Temp) || isnan(Temp_F)) {
    Serial.println(F("Failed to read from DHT sensor!"));
    return;
  }

  // display values in OLED
  display.setCursor(0,0);
  display.clearDisplay();

  display.setTextSize(1);
  display.setCursor(0,0);
  display.print("Temperature = ");

  if(DHT11_UNIT == celsius)
  {
    display.print(Temp);
    display.print("C");
  }
  else
  {
    if(DHT11_UNIT == fahrenheit)
    {
      display.print(Temp_F);
      display.print("F");
    }
  }

  // display humidity
  display.setCursor(0, 25);
  display.print("Humidity = ");
  display.print(Humidity);
  display.print("%");

  display.display();

}
Conclusion
Displaying humidity and temperature on an OLED screen just needs a few external components connected to an Arduino UNO. To make firmware, download and include the sensor and display module libraries appropriately. Next, create the rest of your code by utilizing the Example sketches as references installed along with your downloaded libraries.
SHOP THIS PROJECT
-
Sale!

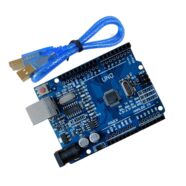
UNO R3 ATmega328P CH340 Development Board – Arduino Compatible with USB Cable
$23.95Original price was: $23.95.$22.95Current price is: $22.95. Add to cart