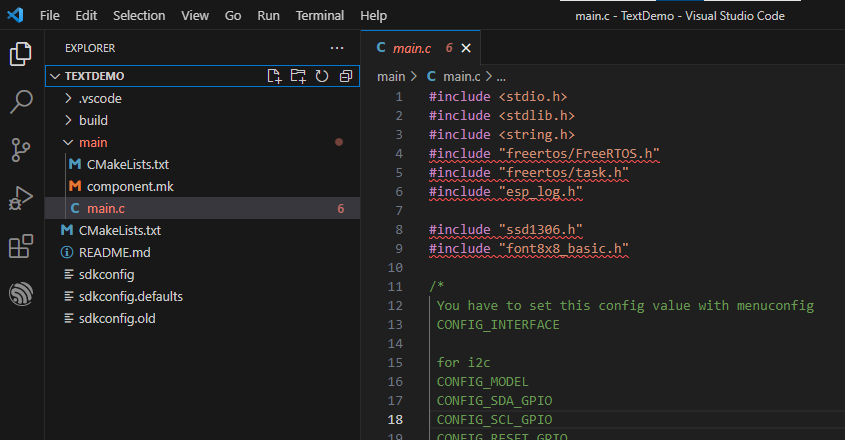
#include <stdio.h>
#include <stdlib.h>
#include <string.h>
#include "freertos/FreeRTOS.h"
#include "freertos/task.h"
#include "esp_log.h"
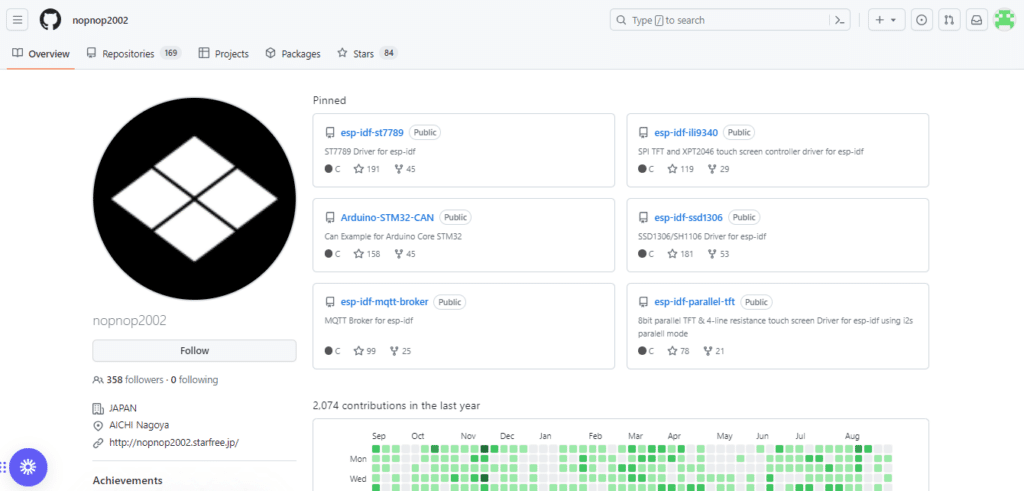
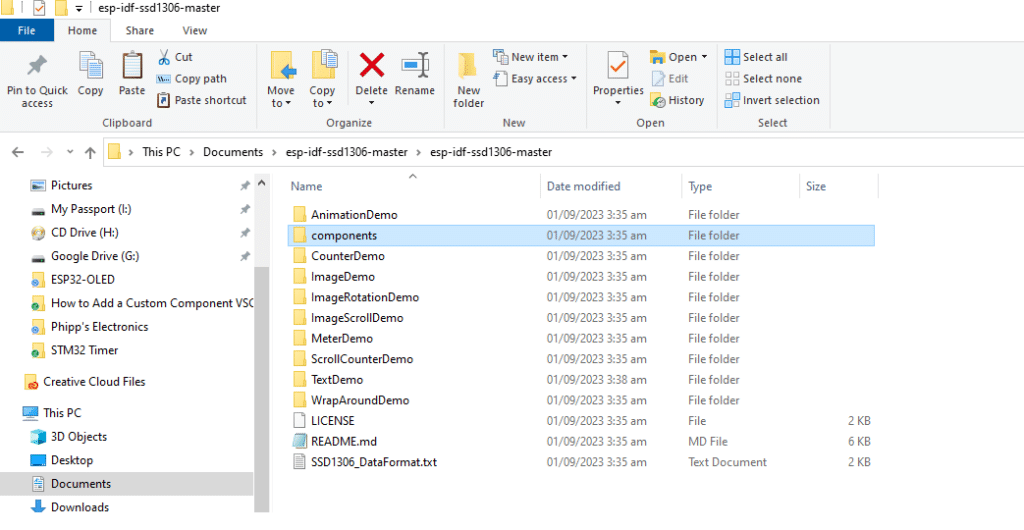
#include "ssd1306.h"
#include "font8x8_basic.h"
/*
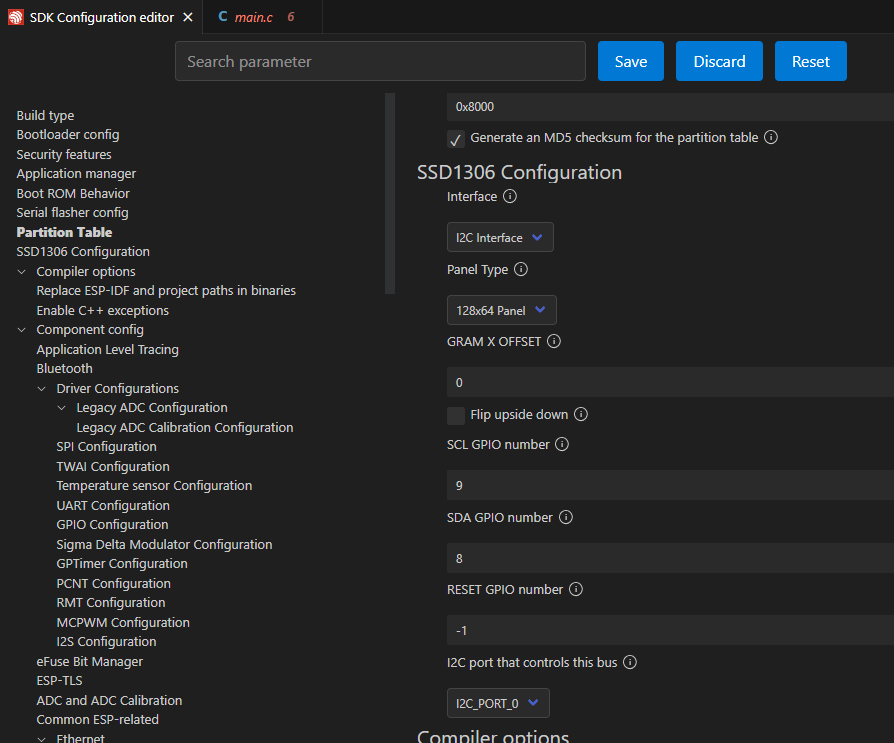
You have to set this config value with menuconfig
CONFIG_INTERFACE
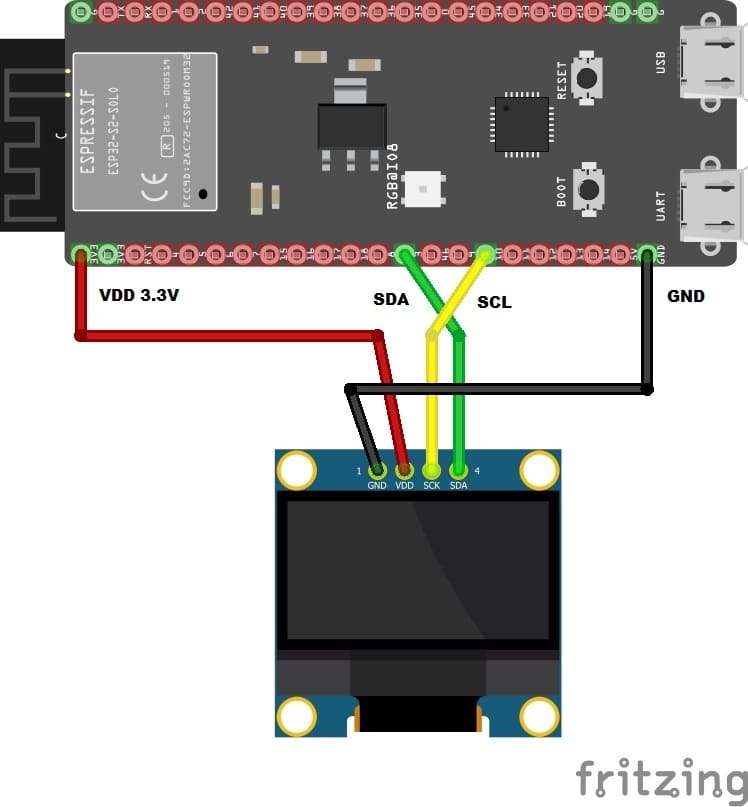
for i2c
CONFIG_MODEL
CONFIG_SDA_GPIO
CONFIG_SCL_GPIO
CONFIG_RESET_GPIO
for SPI
CONFIG_CS_GPIO
CONFIG_DC_GPIO
CONFIG_RESET_GPIO
*/
#define tag "SSD1306"
void app_main(void)
{
SSD1306_t dev;
int center, top, bottom;
char lineChar[20];
#if CONFIG_I2C_INTERFACE
ESP_LOGI(tag, "INTERFACE is i2c");
ESP_LOGI(tag, "CONFIG_SDA_GPIO=%d",CONFIG_SDA_GPIO);
ESP_LOGI(tag, "CONFIG_SCL_GPIO=%d",CONFIG_SCL_GPIO);
ESP_LOGI(tag, "CONFIG_RESET_GPIO=%d",CONFIG_RESET_GPIO);
i2c_master_init(&dev, CONFIG_SDA_GPIO, CONFIG_SCL_GPIO, CONFIG_RESET_GPIO);
#endif // CONFIG_I2C_INTERFACE
#if CONFIG_SPI_INTERFACE
ESP_LOGI(tag, "INTERFACE is SPI");
ESP_LOGI(tag, "CONFIG_MOSI_GPIO=%d",CONFIG_MOSI_GPIO);
ESP_LOGI(tag, "CONFIG_SCLK_GPIO=%d",CONFIG_SCLK_GPIO);
ESP_LOGI(tag, "CONFIG_CS_GPIO=%d",CONFIG_CS_GPIO);
ESP_LOGI(tag, "CONFIG_DC_GPIO=%d",CONFIG_DC_GPIO);
ESP_LOGI(tag, "CONFIG_RESET_GPIO=%d",CONFIG_RESET_GPIO);
spi_master_init(&dev, CONFIG_MOSI_GPIO, CONFIG_SCLK_GPIO, CONFIG_CS_GPIO, CONFIG_DC_GPIO, CONFIG_RESET_GPIO);
#endif // CONFIG_SPI_INTERFACE
#if CONFIG_FLIP
dev._flip = true;
ESP_LOGW(tag, "Flip upside down");
#endif
#if CONFIG_SSD1306_128x64
ESP_LOGI(tag, "Panel is 128x64");
ssd1306_init(&dev, 128, 64);
#endif // CONFIG_SSD1306_128x64
#if CONFIG_SSD1306_128x32
ESP_LOGI(tag, "Panel is 128x32");
ssd1306_init(&dev, 128, 32);
#endif // CONFIG_SSD1306_128x32
#if CONFIG_SSD1306_128x64
top = 2;
center = 3;
bottom = 8;
#endif // CONFIG_SSD1306_128x64
#if CONFIG_SSD1306_128x32
top = 1;
center = 1;
bottom = 4;
#endif // CONFIG_SSD1306_128x32
// main code
while(1)
{
vTaskDelay(3000 / portTICK_PERIOD_MS);
// Hello World
ssd1306_display_text(&dev, 0, "Hello World", 12, false);
vTaskDelay(3000 / portTICK_PERIOD_MS);
ssd1306_clear_screen(&dev, false);
}
}